Best Laravel Installation Tools to Buy in October 2025

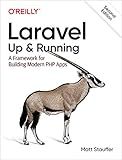
Laravel: Up & Running: A Framework for Building Modern PHP Apps


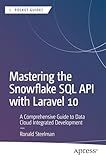
Mastering the Snowflake SQL API with Laravel 10: A Comprehensive Guide to Data Cloud Integrated Development (Apress Pocket Guides)


Laravel Essentials: Tips & Tricks for Developers: Master Laravel with Practical Tips for Every Developer


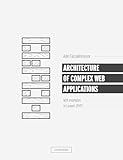
Architecture of complex web applications. Second Edition.: With examples in Laravel(PHP)


Laravel 7.X : LEARN BASIC LESSONS & BUILD A CRUD APP (PHP Framework)


Consuming APIs in Laravel: Build Robust and Powerful API Integrations For Your Laravel Projects With Ease


To install Laravel on Linode, you can follow the steps below:
- Set up a Linode virtual machine (VM) with your chosen Linux distribution.
- Connect to your Linode VM via SSH using a terminal or an SSH client.
- Install PHP and necessary dependencies. Laravel requires PHP version 7.2.5 or higher, along with some extensions like OpenSSL, PDO, Mbstring, Tokenizer, XML, and Ctype. You can install them by running the following command: sudo apt-get install php php-mbstring php-xml php-zip php-curl
- Install Composer. Composer is a dependency manager for PHP packages and will be used to install Laravel. You can download and install Composer by running the following commands: curl -sS https://getcomposer.org/installer -o composer-setup.php sudo php composer-setup.php --install-dir=/usr/local/bin --filename=composer
- Move to the folder where you want to install Laravel. Typically, this would be your website's root directory. You can navigate to the desired folder using the cd command.
- Run the following command to create a new Laravel project: composer create-project --prefer-dist laravel/laravel . This command will download the latest version of Laravel and set up a new project in the current directory.
- Configure the .env file. Laravel uses an environment file to store configuration variables. You can copy the example file and customize it with your specific settings: cp .env.example .env Update the necessary values in the .env file, such as your database credentials and application URL.
- Generate an application key. Laravel requires an application key to secure session data and other encrypted data. Run the following command to generate the key: php artisan key:generate
- Set appropriate file permissions. Ensure that the storage and bootstrap/cache directories are writable by the web server. Depending on your Linux distribution and server setup, you can set the required permissions using commands like: sudo chmod -R 775 storage sudo chmod -R 775 bootstrap/cache
- You can now access your Laravel application by visiting the Linode's IP address or domain name in a web browser.
Remember to refer to the Laravel documentation for further instructions on configuring your application and deploying it on a live server.
What is the default database configuration for Laravel on Linode?
The default database configuration for Laravel on Linode is typically as follows:
DB_CONNECTION=mysql DB_HOST=127.0.0.1 DB_PORT=3306 DB_DATABASE=laravel DB_USERNAME=root DB_PASSWORD=
These values can be found in the .env file of your Laravel project. However, it's important to note that the default database configuration can vary depending on the specific setup and requirements of your Linode server.
What is the best way to handle Laravel application logs on Linode?
There are several ways to handle Laravel application logs on Linode:
- Use Laravel's built-in logging functionality: Laravel provides a powerful logging system out of the box. You can configure the logging channel in your config/logging.php file to store logs in specific locations or send them to external services like syslog or Elasticsearch. By default, Laravel logs to files in the storage/logs directory.
- Rotate logs using logrotate: Logrotate is a Unix utility that automates log rotation. It allows you to manage log files by compressing, deleting, or moving them based on predefined rules. You can create a logrotate configuration file specific to your Laravel application logs to keep them manageable and prevent disk space issues.
- Use a centralized log management solution: If you have multiple servers or applications, it may be beneficial to use a centralized log management solution like Loggly, Papertrail, or ELK (Elasticsearch, Logstash, and Kibana). These services offer features like log aggregation, search, filtering, and real-time monitoring. You can configure Laravel to send logs to these services using the appropriate logging channel configuration.
- Monitor logs with a monitoring tool: Using a monitoring tool like New Relic, Datadog, or Sentry can help you analyze and monitor your Laravel application logs in real-time. These tools provide detailed insights, metrics, and alerts for your application logs, helping you identify and resolve issues quickly.
Ultimately, the best approach depends on your specific requirements, budget, and level of complexity. Consider factors like log size, retention period, searchability, monitoring needs, and integration with your existing infrastructure while choosing the right way to handle Laravel application logs on Linode.
How to secure a Linode server for Laravel deployment?
Securing a Linode server for Laravel deployment involves multiple steps to ensure the server and application are protected against security threats. Here are some recommended steps to follow:
- SSH Access: Restrict SSH access to only specific IP addresses or IP ranges that are authorized to connect to the server. Disable password-based authentication and use SSH keys instead for authentication.
- Firewall Configuration: Set up a firewall to limit incoming and outgoing network traffic. Only allow necessary services and ports to be accessible. For example, allow HTTP (port 80) and HTTPS (port 443) for web traffic.
- Update System: Keep the server's operating system and software up to date with the latest security updates and patches. Configure automatic updates to ensure timely installations.
- Use HTTPS: Configure SSL/TLS certificates to enable HTTPS for secure communication with the web server. This ensures data transmission between the client and server is encrypted.
- Strong Passwords: Enforce strong password policies for all user accounts, including the server's root account, database accounts, and Laravel application user accounts. Use password managers to generate and store complex passwords.
- Secure Database Access: Restrict database access by configuring the database server to only allow connections from the application server's IP address. Create separate database users with limited privileges for the Laravel application.
- Disable Unused Services: Disable any unnecessary services and daemons on the server to minimize potential vulnerabilities and reduce the attack surface.
- Application Security: Implement Laravel's built-in security features such as CSRF protection, input validation, and encryption of sensitive data. Regularly update Laravel and its dependencies to benefit from the latest security fixes.
- Log Monitoring: Enable and review server and application logs regularly to identify potential security incidents or suspicious activities. Implement a centralized logging solution for easier analysis.
- Backup and Disaster Recovery: Set up regular backups of both the application files and the database. Store backups in a secure location or use a cloud backup service. Test the restoration process periodically to ensure backups are viable.
- Intrusion Detection and Prevention: Install and configure intrusion detection and prevention systems (IDS/IPS) to monitor and block suspicious network traffic and activities. Tools like Fail2ban can help in blocking repeated failed login attempts.
- Regular Security Audits: Conduct regular security audits of the server, Laravel application, and related components. Perform vulnerability scans and penetration tests to identify weaknesses and remediate them promptly.
Remember, security is an ongoing process, and it is essential to stay informed about the latest security best practices and vulnerabilities related to Laravel and other server components.
What is the best way to transfer files to a Linode server for Laravel installation?
There are several ways to transfer files to a Linode server for Laravel installation, but the most commonly used methods are:
- Secure Copy (SCP): SCP allows you to securely transfer files between your local machine and the Linode server using the SSH protocol. You can use the following command in your terminal or command prompt to transfer files:
scp /path/to/local/file username@your_linode_ip:/path/to/destination
Replace "/path/to/local/file" with the local file or directory you want to transfer, "username" with your Linode username, "your_linode_ip" with the IP address of your Linode server, and "/path/to/destination" with the directory where you want to place the transferred files.
- FTP/SFTP: You can also use an FTP or SFTP client to transfer files to your Linode server. FileZilla is a popular and user-friendly FTP client that supports SFTP as well. You need to provide the Linode server's IP address, your Linode username and password, and the appropriate port (usually 22 for SFTP) to connect and transfer files.
- Git: If your Laravel project is stored in a Git repository, you can clone the repository directly onto your Linode server using Git commands. First, ensure that Git is installed on your Linode server, then SSH into the server and navigate to the desired directory. Use the following command to clone the repository:
git clone repository_url
Replace "repository_url" with the URL of your Git repository.
Once you have transferred the Laravel files to your Linode server, make sure to follow the necessary installation steps for Laravel, such as setting file permissions, installing dependencies, and configuring the environment.
What are the minimum system requirements for running Laravel on Linode?
The minimum system requirements for running Laravel on a Linode server are as follows:
Operating System: Linode supports a wide range of Linux distributions, including Ubuntu, Debian, CentOS, Fedora, and more. Therefore, you need to choose a Linux distribution based on your preference and compatibility with Laravel.
PHP: Laravel requires at least PHP 7.3 or higher. However, it is recommended to use the latest stable version of PHP for optimal performance.
Web Server: You can use either Apache or Nginx as the web server. Both are capable of running Laravel applications. Apache requires the mod_rewrite module to be enabled, while Nginx requires additional configuration to support Laravel's URL rewriting.
Database: Laravel supports multiple databases, including MySQL, PostgreSQL, SQLite, and SQL Server. You need to choose a database that fits your project requirements. For example, if you choose MySQL, you need to install and configure MySQL server on your Linode.
RAM: Laravel itself does not have any specific RAM requirements. However, a Linode server with at least 1GB of RAM should be sufficient for most Laravel applications. The actual RAM required depends on the complexity and scale of your application.
Storage: The storage requirements depend on the size of your application and database. A Linode server with at least 20GB of storage should be adequate for most Laravel projects. However, you can adjust the storage capacity based on your specific needs.
CPU: Laravel does not have any specific CPU requirements. However, a Linode server with a single CPU core should be sufficient for most small to medium-sized Laravel applications. Again, the CPU requirements may vary based on your application's complexity and traffic.
These are the basic requirements to run Laravel on Linode. It is important to consider the specific needs of your application and adjust the resources accordingly. Additionally, consider other factors such as caching, optimizations, and server management to ensure optimal performance.
What is the recommended caching solution for Laravel on Linode?
There isn't a specific recommended caching solution for Laravel on Linode as it largely depends on your specific needs and preferences. However, here are some common caching solutions used with Laravel:
- Redis: Redis is an in-memory data structure store that can be used as a cache or a messaging broker. It is frequently used with Laravel for caching due to its fast performance and extensive feature set.
- Memcached: Memcached is a high-performance distributed memory object caching system. It is often used with Laravel for its simplicity and speed.
- APCu: APCu (Alternative PHP Cache user cache) is an in-memory PHP caching extension that is useful for storing data directly in memory and minimizing the overhead of disk-based caching.
- Database caching: Laravel provides database caching out of the box, which allows you to store cached data directly in your database. This can be a convenient option if you already have a database set up.
Ultimately, the choice of the caching solution will depend on your specific requirements, scalability needs, and available resources. It's recommended to benchmark and test different caching solutions to find the one that works best for your Laravel application on Linode.
