Best Webpack TypeScript Tools to Buy in October 2025
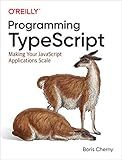
Programming TypeScript: Making Your JavaScript Applications Scale


Essential TypeScript 5, Third Edition


Angular Development with TypeScript


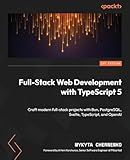
Full-Stack Web Development with TypeScript 5: Craft modern full-stack projects with Bun, PostgreSQL, Svelte, TypeScript, and OpenAI


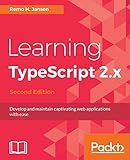
Learning TypeScript 2.x: Develop and maintain captivating web applications with ease, 2nd Edition


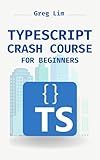
TypeScript Crash Course for Beginners: Boost your JavaScript projects with TypeScript: Learn about core types, generics, TypeScript & more


React and React Native: Build cross-platform JavaScript and TypeScript apps for the web, desktop, and mobile


TypeScript


Mastering Functional Programming with TypeScript: Unlocking the Power of Functional Programming for Robust Web Applications


To set up webpack for TypeScript, first install the necessary packages by running the following command:
npm install webpack webpack-cli webpack-dev-server typescript ts-loader
Next, create a tsconfig.json file in the root directory of your project. Configure this file with your TypeScript compiler options.
In your webpack.config.js file, specify the entry point of your application and the output bundle location. Also, add a module rule for TypeScript files using the ts-loader plugin.
Run webpack to build your TypeScript project by running the command:
npx webpack
To set up webpack-dev-server for live reloading, add the following script to your package.json file:
"scripts": { "start": "webpack-dev-server --open" }
Now you can run npm start to start the webpack-dev-server and view your TypeScript application in the browser.
How to optimize performance in a webpack setup for TypeScript projects?
- Use tree shaking: Enable tree shaking in your webpack config to eliminate unused code and reduce the overall bundle size.
- Minify your code: Use a minification tool like UglifyJSPlugin to reduce the size of your JavaScript files.
- Split your code: Use code splitting to separate your code into smaller chunks that can be loaded separately, improving load times.
- Use source maps: Enable source maps in your webpack config to help with debugging and improve build times.
- Use a production mode: Set your webpack config to production mode to enable optimizations like minification and tree shaking.
- Cache busting: Use content hashes in your output file names to ensure that browsers fetch the latest version of your files rather than using cached versions.
- Optimize images and assets: Use tools like imagemin-webpack-plugin to optimize images and other assets for better performance.
- Use code splitting: Splitting your code into smaller modules that are only loaded when needed can significantly improve the performance of your webpack setup.
- Cache results: Make use of tools like HardSourceWebpackPlugin to cache the results of webpack builds for faster rebuild times.
- Avoid unnecessary imports: Make sure to only import the modules and libraries that you actually need in your project, to prevent unnecessary bloat in your bundle.
What is tree shaking and how can it be achieved in a webpack configuration for TypeScript?
Tree shaking is the process of eliminating unused code from your production bundle, which helps reduce the final file size and improve performance. In the context of webpack, tree shaking is achieved by analyzing your code and only including the parts that are actually used in your application.
To achieve tree shaking in a webpack configuration for TypeScript, you can follow these steps:
- Make sure you are using ES6 modules in your TypeScript code. This is essential for tree shaking to work properly, as ES6 modules have built-in support for static analysis.
- Install the necessary packages for webpack to handle TypeScript files:
npm install typescript ts-loader @babel/preset-env @babel/preset-typescript babel-loader @babel/core webpack webpack-cli --save-dev
- Configure webpack to handle TypeScript files by adding a rule in your webpack configuration file (e.g. webpack.config.js):
module.exports = { //... module: { rules: [ { test: /\.tsx?$/, loader: 'ts-loader', exclude: /node_modules/, }, ], }, resolve: { extensions: [".tsx", ".ts", ".js"], }, };
- Enable the optimization flag in your webpack configuration to enable tree shaking:
module.exports = { //... optimization: { usedExports: true, minimize: true, }, };
- Add a build script in your package.json file to build your TypeScript code using webpack:
"scripts": { "build": "webpack --mode production" }
Now, when you run npm run build, webpack will analyze your TypeScript code and only include the parts that are actually used in your application, resulting in a smaller bundle size with improved performance.
How to configure webpack for TypeScript?
To configure webpack for TypeScript, you can follow these steps:
- Install necessary packages: First, you need to make sure you have the necessary packages installed. Install the following packages using npm:
npm install typescript webpack webpack-cli ts-loader @types/webpack @types/node --save-dev
- Create a TypeScript configuration file: Create a tsconfig.json file in your project root directory. Here is an example configuration:
{ "compilerOptions": { "module": "commonjs", "target": "es5", "sourceMap": true } }
- Configure webpack: Create a webpack.config.js file in your project root directory. Here is an example configuration:
const path = require('path');
module.exports = { entry: './src/index.ts', output: { path: path.resolve(__dirname, 'dist'), filename: 'bundle.js' }, resolve: { extensions: ['.ts', '.tsx', '.js'] }, module: { rules: [ { test: /\.tsx?$/, use: 'ts-loader', exclude: /node_modules/ } ] } };
- Update your package.json file: Add a script in your package.json file to run webpack:
"scripts": { "build": "webpack" }
Now you can run webpack by executing npm run build in your terminal.Webpack will transpile your TypeScript code using the TypeScript loader and generate a JavaScript bundle file in the dist directory.
How to install webpack for TypeScript?
To install webpack for TypeScript, you will need to follow these steps:
- Install webpack and webpack-cli:
npm install webpack webpack-cli --save-dev
- Install TypeScript and TypeScript loader for webpack:
npm install typescript ts-loader --save-dev
- Create a tsconfig.json file in the root of your project to configure TypeScript:
{ "compilerOptions": { "target": "es5", "module": "commonjs", "strict": true } }
- Create a webpack configuration file (e.g. webpack.config.js) in the root of your project to configure webpack:
const path = require('path');
module.exports = { entry: './src/index.ts', output: { path: path.resolve(__dirname, 'dist'), filename: 'bundle.js' }, resolve: { extensions: ['.ts', '.js'] }, module: { rules: [ { test: /\.ts$/, use: 'ts-loader', exclude: /node_modules/ } ] } };
- Create a TypeScript file (e.g. index.ts) in the src directory of your project:
console.log('Hello, TypeScript!');
- Run webpack to bundle your TypeScript code:
npx webpack
After following these steps, webpack should bundle your TypeScript code and output the bundled file in the dist directory of your project.
How to optimize the build process in webpack for TypeScript projects?
- Use webpack typescript loader: Webpack has built-in support for compiling TypeScript files using the ts-loader. This loader transpiles TypeScript code into JavaScript code using the TypeScript compiler. By using ts-loader, you can easily integrate TypeScript files into your webpack build process.
- Enable sourcemaps: Sourcemaps are files that map the transpiled JavaScript code back to the original TypeScript code. This can be very helpful when debugging your application. To enable sourcemaps in webpack, set the devtool option to 'source-map'.
- Use webpack plugins: There are several webpack plugins available that can help optimize the build process for TypeScript projects. For example, the ForkTsCheckerWebpackPlugin plugin can run type checking in a separate process to speed up build times. The HtmlWebpackPlugin plugin can be used to automatically generate HTML files for your application.
- Use code splitting: Code splitting is a technique that allows you to split your code into smaller chunks which can be loaded on-demand. This can help reduce the initial load time of your application. Webpack supports code splitting out of the box, so make use of this feature in your TypeScript projects.
- Minify and compress your code: Minification and compression are techniques that can help reduce the size of your JavaScript bundles. There are several webpack plugins available that can minify and compress your code, such as terser-webpack-plugin and compression-webpack-plugin. By using these plugins, you can optimize the size of your bundles and improve the performance of your application.
- Use tree shaking: Tree shaking is a technique that eliminates unused code from your bundles. This can help reduce the size of your bundles and improve the performance of your application. To enable tree shaking in webpack, make sure to set the 'optimization' option to enable the 'usedExports' flag.
By following these tips, you can optimize the build process in webpack for TypeScript projects and improve the performance of your applications.
What is the difference between webpack and webpack-dev-server for TypeScript?
Webpack is a module bundler for JavaScript applications, while webpack-dev-server is a development server that enables hot module replacement and other features for faster development.
For TypeScript applications, webpack is typically used to bundle all the TypeScript files into a single file for deployment, while webpack-dev-server is used during development to quickly serve the files and provide features like live reloading.
In summary, webpack is used for bundling and building TypeScript applications, while webpack-dev-server is used for development purposes such as serving files and enabling hot module replacement.
