Best Testing Tools to Buy in October 2025
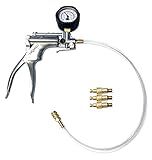
Marine Tech Tools Gearcase Pressure & Vacuum Tester, Gearcase Pressure Tester, Gearcase Vacuum Tester, Vacuum and Pressure Tester Kit, Fits Chrysler, Evinrude, Force, Johnson & Mercury Outboards Tools
- DUAL FUNCTION: PRESSURE AND VACUUM TESTING IN ONE EASY UNIT!
- COMPLETE KIT: INCLUDES ADAPTERS FOR TOP BRANDS LIKE SUZUKI AND YAMAHA.
- QUICK DISCONNECT: FAST INSTALLATION WITH BRASS SWIVEL CONNECTOR EASE.


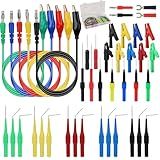
SWANLAKE 43-Piece Back Probe Kit, 30A Multi-Angle Test Probe, 4mm Banana Plug to Copper Alligator Clips, U-Shaped Connectors, Automotive Electrical Circuit Diagnosis Car Repairing Tools
-
ENHANCED TESTING PRECISION: COLOR-CODED PROBES ENSURE ACCURATE MULTI-ANGLE ACCESS.
-
RELIABLE CONNECTIVITY: HIGH-QUALITY LEADS & BANANA PLUGS ENSURE STRONG CONNECTIONS.
-
VERSATILE FOR ALL USERS: PERFECT FOR AUTOMOTIVE, LABS, SCHOOLS, AND INDUSTRIAL USE.
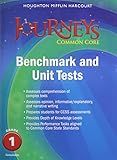
Benchmark Tests and Unit Tests Consumable Grade 1 (Journeys)
The Art of Unit Testing: with examples in C#

UNI-T LCD USB Type C Digital Tester - Power Voltage Amps Meter Current Capacity Cable Tester Tool, UT658Dual DC 4-24V Voltmeter Ammeter Detector Inspecting Portable Power Sources
- ACCURATE MEASUREMENTS: MONITORS VOLTAGE, CURRENT, AND CAPACITY EASILY.
- VERSATILE COMPATIBILITY: WORKS WITH USB, TYPE-C, AND FAST CHARGE PROTOCOLS.
- PROTECT YOUR DEVICES: ENSURES EFFICIENT CHARGING AND DEVICE SAFETY.
UNI-T UT210e Digital Clamp Meter AC DC Amp Meter Clamp Multimeter True RMS 2000 Counts Voltmeter Continuity Tester Capacitor HVAC Tool Multi Tester
- VERSATILE CLAMP METER: IDEAL FOR HVAC, AUTOMOTIVE, & ELECTRICAL TASKS.
- PRECISION MEASUREMENTS: TRUE RMS, 2,000 COUNTS, ENSURES ACCURACY.
- SAFETY FIRST: CAT II 600V RATED WITH OVERLOAD PROTECTION AND GRIP.
To run unit tests in CodeIgniter, you can follow these steps:
- Create a new folder called tests in the root directory of your CodeIgniter installation.
- Inside the tests folder, create a new file called phpunit.xml. This file will contain the configuration for running unit tests.
- Open the phpunit.xml file and add the following code:
- Save the phpunit.xml file.
- Inside the tests folder, create another folder called bootstrap.
- Inside the bootstrap folder, create a new file called phpunit_bootstrap.php. This file will be used for any necessary setup before running the tests.
- Open the phpunit_bootstrap.php file and add any necessary setup code. For example, you can include the CodeIgniter framework by adding the following code:
require_once APPPATH . '/bootstrap.php';
- Save the phpunit_bootstrap.php file.
- Now you can create your unit test files. Inside the tests folder, create a new folder called cases.
- Inside the cases folder, create a new PHP file for each unit test you want to run. Each file should contain a separate class that extends the CodeIgniter PHPUnit_Framework_TestCase class.
- Write the necessary unit test methods inside each class, using the available CodeIgniter testing functions such as $this->assertTrue(), $this->assertEquals(), etc.
- Save your unit test files.
To run the unit tests, open a command prompt or terminal and navigate to the root directory of your CodeIgniter installation. Then execute the following command:
$ php vendor/phpunit/phpunit/phpunit
This command will run all the unit test cases inside the tests/cases folder and display the test results in the command prompt or terminal. You can also add specific test case files or directories as arguments to the command to run only specific tests.
That's it! You now know how to run unit tests in CodeIgniter.
What is the structure of a unit test in CodeIgniter?
In CodeIgniter, unit tests are created using the PHP unit testing framework. The structure of a unit test in CodeIgniter generally follows the given steps:
- Create a new test class: Firstly, you need to create a new test class that extends the PHPUnit\Framework\TestCase class. This class will contain all the test methods.
class MyTestClass extends PHPUnit\Framework\TestCase { // Test methods will be defined here }
- Initialize necessary objects: Before writing test methods, you may need to initialize certain objects or components that are required for testing. You can do this by overriding the setUp() method.
public function setUp(): void { // Initialize required objects or components here $this->object = new MyClass(); }
- Write test methods: These are individual methods that test a specific piece of code. Each test method should be named starting with the word "test" followed by a descriptive name.
public function testMethod1() { // Implement the test logic here $result = $this->object->myMethod(); $this->assertEquals('', $result); }
public function testMethod2() { // Implement another test logic here // Add assertions to verify the results }
- Add assertions: Assertions are used to check if the expected results match the actual results. CodeIgniter provides several assertion methods, such as assertEquals(), assertNotEmpty(), assertTrue(), etc., which can be used to verify the expected behaviors of the code being tested.
$this->assertEquals('', $actualValue); $this->assertTrue($condition); // ... Other assertion methods
- Run the tests: Finally, you need to execute the tests to see the results. This can be done either through the command line using PHPUnit's test runner or through an integrated development environment (IDE) that supports PHPUnit.
By following this structure, you can easily create and run unit tests in CodeIgniter to ensure the correctness and reliability of your code.
How to create a test class in CodeIgniter?
To create a test class in CodeIgniter, you can follow these steps:
- Create a new test file: Create a new file in your application/tests/ directory with a .php extension. For example, MyTest.php
- Extend the CIUnitTestCase class: In your test file, create a new class that extends the CIUnitTestCase class. This will give you access to the CodeIgniter testing functions and tools.
- Add test methods: Inside your test class, you can define different test methods. These methods should start with the word "test" and can contain the test assertions you want to perform.
- Use CodeIgniter assertions and testing features: Inside your test methods, you can use various assertions and testing features provided by CodeIgniter. For example, you can load models, call controller methods, check database records, and more. load->model('example_model'); $result = $this->example_model->getData(); $this->assertCount(5, $result); $this->assertArrayHasKey('id', $result[0]); } }
- Run the tests: To run your tests, you can use the CodeIgniter test runner. Open your terminal or command prompt, navigate to your application/tests/ directory, and run the following command: phpunit . This will run all the test classes in your tests directory and display the results.
That's it! You have now created a test class in CodeIgniter using CIUnitTestCase and can write test methods to test your code.
How to simulate user input in CodeIgniter unit tests?
In CodeIgniter, you can simulate user input in unit tests by using the set_request() method provided by the CI_UnitTestCase class. Here's how you can do it:
- Create a unit test file for your controller or library. For example, if you want to test a controller named "MyController", create a file named "MyController_test.php" in your "tests" directory.
- In the unit test file, extend the CI_UnitTestCase class by using the following code:
class MyController_Test extends CI_UnitTestCase { // ... }
- Create a method that will simulate the user input. For example, if you want to simulate a POST request with some input, create a method like this:
public function test_some_method() { // Simulate POST request with user input $this->set_request([ 'request' => 'POST', 'controller' => 'mycontroller', 'method' => 'some_method', 'post' => [ 'input1' => 'value1', 'input2' => 'value2' ] ]);
// Test your controller's method
$this->obj = new MyController();
$this->obj->some\_method();

// Add your assertions here
}
In the set_request() method, you can specify the request type (GET, POST, etc.), the controller name, method name, and any POST data you want to simulate.
- Finally, run your unit tests using PHPUnit, either through the command line or your IDE.
By simulating user input in your unit tests, you can test your controllers' behavior based on different request types and input values.
How to mock dependencies in CodeIgniter unit tests?
To mock dependencies in CodeIgniter unit tests, you can use the Mockery library. Follow the steps below:
- Install the Mockery library via Composer by running the command composer require mockery/mockery --dev in your project directory.
- In your unit test file, include the Mockery namespace using the use keyword:
use Mockery;
- Create a mock instance of your dependency using Mockery's mock function. For example, if you want to mock a database model called UserModel, you can do the following:
$userModelMock = Mockery::mock('UserModel');
- Set up expectations and return values for the mocked methods using Mockery's fluent interface. For example, if you want the getUser method of UserModel to return a predefined value, you can do the following:
$userModelMock->shouldReceive('getUser')->andReturn(['id' => 1, 'name' => 'John']);
- Replace the actual instance of the dependency with the mock instance in your CodeIgniter controller or class. You can use CodeIgniter's dependency injection to accomplish this:
$userModel = $this->app->make('UserModel'); $this->app->instance('UserModel', $userModelMock);
- After setting up the necessary mock objects and replacing the dependencies, you can continue writing your unit test cases using the mocked dependencies.
- In the tearDown method of your test class, you need to call the close method of the mock object to clean up the resources:
public function tearDown(): void { Mockery::close(); }
By following these steps, you can mock dependencies in your CodeIgniter unit tests and test your code without relying on the actual implementation of those dependencies.