
Best Authentication Solutions for Laravel to Buy in October 2025

Modern Authentication with Azure Active Directory for Web Applications (Developer Reference)


Windows Security Internals: A Deep Dive into Windows Authentication, Authorization, and Auditing

Computer Networks: A Systems Approach (The Morgan Kaufmann Series in Networking)
Hacking with Kali Linux: Wireless Penetration: A Beginner's Guide with Practical Examples to Learn to Create a Wireless Lab for Experiments, Sniff Out Hidden Networks and Attack Authentication Systems

Identity Management with Biometrics: Explore the latest innovative solutions to provide secure identification and authentication

Hacking Multifactor Authentication

Water System Operations (WSO) Water Distribution, Grades I & II (Awwa Water System Operations)
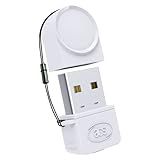
ACS AFD01-A1 Pocket Key High Speed ID Online FIDO® USB Security Key/FIDO U2F/FIDO2/FIDO2 CTAP2/2-Step Authentication
- FAST DATA TRANSFER SPEEDS FOR QUICK FILE SHARING AND BACKUPS.
- UNIVERSAL COMPATIBILITY WITH DEVICES FOR SEAMLESS CONNECTIVITY.
- REVERSIBLE DESIGN FOR EASY PLUG-AND-PLAY CONVENIENCE.
In Laravel, handling user authentication is relatively easy due to the built-in authentication system provided by the framework. The authentication system handles various aspects of user authentication, such as login, registration, password reset, and email verification.
To begin with, Laravel provides a pre-built authentication scaffold that can be generated using the make:auth Artisan command. This command generates all the necessary controllers, views, and routes required for user authentication.
Once the authentication scaffold is set up, you can easily handle user authentication by utilizing the following features:
- User Model: Laravel uses the User model to interact with the database table for storing user records. This model includes methods for user authentication and password hashing.
- Middleware: Laravel includes middleware, such as auth and guest, which allow you to restrict access to certain routes based on user authentication status. For example, the auth middleware only allows authenticated users to access specific routes.
- Authentication Controller: Laravel provides an Auth controller that handles login and registration logic out of the box. You can customize this controller to add additional functionality or modify the existing behavior.
- Views: Laravel generates views for authentication-related pages, such as login and registration forms, with the make:auth command. You can modify these views to match your application's design or create your own views from scratch.
- Authentication Methods: Laravel provides convenient methods for user authentication, such as Auth::attempt() to authenticate user credentials, Auth::user() to get the authenticated user instance, and Auth::check() to determine if a user is authenticated.
- Password Reset: Laravel includes functionality for password reset by sending password reset emails to users. Users can then reset their passwords by following the link provided in the email.
- Email Verification: Laravel also supports email verification, where users are required to verify their email addresses before accessing certain features of the application. This can be enabled by implementing the MustVerifyEmail contract in the User model.
By leveraging these features, Laravel simplifies user authentication, making it relatively straightforward to implement and customize according to your application's specific requirements.
How to redirect users based on their authentication status in Laravel?
To redirect users based on their authentication status in Laravel, you can use middleware. Laravel provides a built-in middleware called "auth" which allows you to check if a user is authenticated or not.
- First, open app/Http/Kernel.php file and find the $routeMiddleware array. Add the following line to register the "auth" middleware:
'auth' => \App\Http\Middleware\Authenticate::class,
- Next, open app/Http/Middleware/RedirectIfAuthenticated.php file which contains the logic for redirecting authenticated users. By default, the file contains the following code:
namespace App\Http\Middleware;
use Closure; use Illuminate\Support\Facades\Auth;
class RedirectIfAuthenticated { public function handle($request, Closure $next, $guard = null) { if (Auth::guard($guard)->check()) { return redirect('/home'); // Modify this line to change the redirect path }
    return $next($request);
}
}
The code checks if the user is authenticated using the Auth::guard($guard)->check() method. If authenticated, it will redirect the user to the specified path.
- Modify the return redirect('/home') line to specify the path you want to redirect authenticated users to. For example, if you want to redirect them to the dashboard page, you can change it to:
return redirect('/dashboard');
- Once you have modified the RedirectIfAuthenticated middleware, you can use it in your routes. For example, in your routes/web.php file, you can define a route group with the "auth" middleware:
Route::middleware(['auth'])->group(function () { // Routes that require authentication });
All the routes inside this group will be accessible only to authenticated users. If an unauthenticated user tries to access these routes, they will be redirected based on the logic in the RedirectIfAuthenticated middleware.
Note: Make sure to run php artisan route:clear command to clear the route cache for the changes to take effect.
How to implement social media authentication (e.g., Facebook, Google) in Laravel?
To implement social media authentication in Laravel using Facebook and Google, you can follow the below steps:
- Create and configure the application on Facebook and Google Developer consoles to obtain the necessary credentials: For Facebook, create a new app at the Facebook Developer portal and obtain the App ID and App Secret. For Google, create a new project in the Google Developer Console and enable the Google Sign-In API. Obtain the Client ID and Client Secret.
- Install and configure Laravel Socialite package: Install the package using Composer by running the command composer require laravel/socialite. Configure the provider credentials in the config/services.php file by adding the Facebook and Google credentials obtained in step 1.
- Create routes and controller methods: Define routes for Facebook and Google authentication in your routes/web.php file. Create controller methods that will handle the authentication flow.
- Handle the authentication flow in the controller methods: For Facebook, define a new method in your controller that redirects the user to Facebook for authentication. In the callback URL method, retrieve the user data using the Socialite facade. For Google, follow a similar approach as above, but with different route/controller methods for authentication and callback URL.
- Use the retrieved user data to authenticate or register the user: After retrieving user data from the Facebook/Google callback URL, you can check if the user is already registered in your application. If not, create a new user in your application. If the user is already registered, authenticate them into your application using Laravel's built-in authentication system.
- Test the authentication flow: Test your authentication flow by accessing the defined Facebook/Google authentication routes. Make sure the user is redirected to the respective social media platform for authentication and is returned back to your application after authentication.
By following these steps, you can implement social media authentication in Laravel using Facebook and Google.
How to handle failed authentication attempts in Laravel?
There are several ways to handle failed authentication attempts in Laravel:
- Redirect back with an error message: In the login controller, you can use the attempt method to check the credentials entered by the user. If the authentication fails, you can redirect back to the login page with an error message.
public function login(Request $request) { $credentials = $request->only('email', 'password');
if (Auth::attempt($credentials)) {
    // Authentication passed, redirect to a desired location
    return redirect()->intended('dashboard');
}

// Authentication failed, redirect back with an error message
return redirect()->back()->withInput()->withErrors(\[
    'email' => 'Invalid credentials',
\]);
}
- Throttling failed attempts: Laravel provides a throttle middleware that can be applied to specific routes to limit the number of failed authentication attempts per minute. This prevents brute-force attacks. You can add the middleware to your web middleware group located in app/Http/Kernel.php:
protected $middlewareGroups = [ 'web' => [ // Other middleware... \Illuminate\Routing\Middleware\ThrottleRequests::class, ], ];
- Customizing the authentication logic: Laravel offers methods to customize the default authentication logic. For example, you can override the sendFailedLoginResponse function in the LoginController to handle specific actions when authentication fails.
protected function sendFailedLoginResponse(Request $request) { throw ValidationException::withMessages([ $this->username() => [trans('auth.failed')], ]); }
These are just a few examples of handling failed authentication attempts in Laravel. You can tailor the logic according to your application requirements.
What is the difference between authentication and authorization in Laravel?
In Laravel, authentication and authorization are two distinct concepts:
- Authentication: Authentication refers to the process of verifying the identity of a user. It involves validating the user's credentials, such as username and password, to ensure they are who they claim to be. Laravel provides a built-in authentication system that includes features like user registration, login, logout, and password reset.
- Authorization: Authorization, on the other hand, is the process of granting or denying access permissions to authenticated users. After a user is authenticated, Laravel's authorization system determines whether they are allowed to perform certain actions or access specific resources based on their role, permissions, or other authorization rules. This includes defining and managing roles, permissions, and policies to control access to various parts of the application.
In summary, authentication is the process of identifying users, while authorization is about determining what actions or resources a user is allowed to access.
How to enable two-factor authentication in Laravel?
To enable two-factor authentication in Laravel, you can follow these steps:
- Install the Laravel package for two-factor authentication by running the following command in your terminal: composer require pragmaRX/laravel-2fa
- After the installation, publish the package's configuration file by running the command: php artisan vendor:publish --provider="PragmaRX\TwoFactorAuth\TwoFactorAuthServiceProvider" --tag="config"
- Open the config/2fa.php file and configure the settings according to your requirements. You can set options such as the lifetime of the two-factor authentication token, the user models to be used, etc.
- Next, run the migration command to create the necessary database table for storing the two-factor authentication secrets: php artisan migrate
- Update your User model to include the TwoFactorAuthenticatable trait. This trait provides the necessary methods for enabling and managing two-factor authentication for a user. Add the following line to your User model: use PragmaRX\TwoFactorAuth\Traits\HasTwoFactorAuthentication; class User extends Authenticatable implements TwoFactorAuthenticatable { use HasTwoFactorAuthentication; // ... }
- In your config/auth.php file, set the guards web provider to users.
- If you are using Laravel's default authentication scaffolding, the two-factor authentication views will be located in the resources/views/vendor/2fa directory. Customize these views as per your needs.
- Finally, you can protect the routes or middleware with two-factor authentication by using the 2fa middleware. For example: Route::get('/dashboard', function () { return view('dashboard'); })->middleware(['auth', '2fa']); This will require the user to go through two-factor authentication before accessing the '/dashboard' route.
That's it! You have now enabled two-factor authentication in Laravel using the pragmaRX/laravel-2fa package.