Best Tools and Resources for Creating Heat Maps to Buy in October 2025
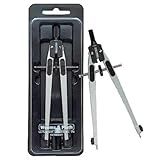
Weems & Plath #176 Marine Navigation Ultralight Divider
- DURABLE MARINE ALLOY RESISTS CORROSION FOR LONG-LASTING USE.
- EASY-TO-USE CENTER GEAR MECHANISM WITH SPARE PARTS INCLUDED.
- TRUST IN QUALITY: MADE IN GERMANY WITH A LIFETIME WARRANTY.


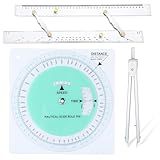
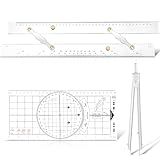
Dunzoom 3 Pcs Marine Navigation Kit, Basic Navigation Set Include 18" Marine Parallel Ruler with Clear Scales, 8" Diameter Nautical Plotter Protractor, 6" Fixed Point Divider for Boat Accessories
- ESSENTIAL TOOLS FOR PRECISE NAVIGATION, ENSURING ACCURATE MARINE JOURNEYS.
- DURABLE, HIGH-QUALITY MATERIALS GUARANTEE LONG-LASTING, RELIABLE USE.
- CONVENIENT DESIGN ENHANCES YOUR SAILING EXPERIENCE ANYTIME, ANYWHERE.
Saysurey Parallel Ruler Marine Navigation Tool with Clear Scales Parallel Ruler with Brushed Aluminum Arms Nautical Charts Navigation Tools for Boat Ship Drawing(12 Inch)
-
PLOT WITH PRECISION: ACCURATE BEARINGS AND COURSE LINES, EFFORTLESS MAPPING.
-
BUILT TO LAST: DURABLE ACRYLIC AND ALUMINUM DESIGN, WITHSTANDS HEAVY USE.
-
CLEAR VISIBILITY: HIGH TRANSPARENCY ENSURES UNOBSTRUCTED VIEW FOR ACCURACY.
Motipuns 3 Pcs Basic Navigation Set, Include 16 Inch Marine Parallel Ruler with Clear Scales Navigation Divider Marine Nautical Protractor 6 Inch Marine Fixed Points Divider for Boat
- COMPLETE NAVIGATION KIT FOR ALL YOUR ESSENTIAL MARINE TASKS.
- PRECISION TOOLS ENSURE ACCURACY AND CLARITY FOR ULTIMATE NAVIGATION.
- EASY-TO-USE DESIGN PERFECT FOR PRACTICING SKILLS ON THE GO.
WEEMS & PLATH Essentials Navigation Kit
- ULTRALIGHT DESIGN FOR EASY PORTABILITY ON ANY SAILING ADVENTURE.
- ACCURATE PLOTTING WITH WEEMS PARALLEL PLOTTER FOR PRECISE NAVIGATION.
- NAUTICAL SLIDE RULE SIMPLIFIES CALCULATIONS FOR FASTER DECISION-MAKING.
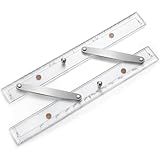
Weems & Plath Marine Navigation Parallel Ruler (Aluminum Arms, 15-Inch)
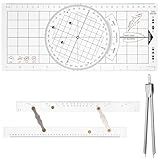
3 Pcs Basic Navigation Set, Including Marine Parallel Ruler, Nautical Protractor, and Navigation Fixed Point Divider, Marine Accessories with Clear Scales for Boat
- ALL-IN-ONE KIT FOR PRECISE MARINE NAVIGATION TASKS AND SKILLS.
- HIGH-QUALITY MATERIALS ENSURE CLARITY AND DURABILITY IN ANY ENVIRONMENT.
- USER-FRIENDLY TOOLS EMPOWER NAVIGATION PRACTICE ANYTIME, ANYWHERE.
RII Nautical Brass Navigation Divider, Straight Navigation Divider (Small) for Maritime & Naval, Antique Geometry Drafting Compass, Geometry Drafting Compass Professional Work with Leather Case
- PREMIUM BRASS & STAINLESS STEEL ENSURE DURABILITY AND PRECISION.
- PERFECT FOR ARCHITECTS, ENGINEERS, AND ARTISTS-VERSATILE FOR ALL TASKS.
- ADJUSTABLE DESIGN ALLOWS FOR ACCURATE MEASUREMENTS AND EASE OF USE.
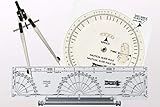
Weems & Plath #317 Basic Navigation Set
- VERSATILE WEEMS PROTRACTOR FOR PRECISE MEASUREMENTS AND DESIGNS.
- DURABLE 15-INCH PARALLEL RULE ENSURES ACCURATE STRAIGHT LINES.
- LIFETIME WARRANTY GUARANTEES LASTING QUALITY AND PERFORMANCE.
Weems & Plath Marine Navigation Primary Navigation Set
- ULTRALIGHT DIVIDER/COMPASS FOR PRECISE NAVIGATION.
- 12-INCH PARALLEL RULER ENSURES ACCURATE MEASUREMENTS.
- DURABLE POUCH KEEPS TOOLS ORGANIZED AND PROTECTED.
To create a heat map in Chart.js, you will need to first include the Chart.js library in your project. Then, you can create a new Chart object, specifying the type as 'heatmap'. Next, you will need to define the data for the heat map in a format that includes both the x and y coordinates of each point, as well as the value of that point. Finally, you can customize the appearance of the heat map by setting options such as the color scheme, axis labels, and title. Once you have completed these steps, you should be able to display a heat map in your project using Chart.js.
What is the best practice for labeling axes in a heat map using Chart.js?
The best practice for labeling axes in a heat map using Chart.js is to clearly label the x and y axes with appropriate titles that clearly convey what each axis represents.
For the x-axis, you should label it with categories or labels that represent the different groups or intervals being displayed in the heat map. For example, if the heat map is showing data for different months, the x-axis should be labeled with the months of the year.
For the y-axis, you should also label it with categories or labels that represent the different groups or intervals being displayed in the heat map. For example, if the heat map is showing data for different products, the y-axis should be labeled with the names of the products.
Additionally, you should consider rotating the labels on the x-axis if they are too long to fit horizontally, and make sure the font size is large enough to be easily readable.
Overall, the key is to provide clear and descriptive labels for both axes to help viewers quickly understand the data being presented in the heat map.
How to display axis labels on a heat map in Chart.js?
To display axis labels on a heat map in Chart.js, you can use the scales option in the chart configuration. Here is an example of how to display axis labels on a heat map:
var ctx = document.getElementById('myChart').getContext('2d'); var myChart = new Chart(ctx, { type: 'heatmap', data: { labels: ['Label 1', 'Label 2', 'Label 3'], datasets: [{ data: [ [10, 20, 30], [40, 50, 60], [70, 80, 90] ] }] }, options: { scales: { x: { type: 'category', labels: ['X Axis Label 1', 'X Axis Label 2', 'X Axis Label 3'] }, y: { type: 'category', labels: ['Y Axis Label 1', 'Y Axis Label 2', 'Y Axis Label 3'] } } } });
In this example, we have defined the labels for both the x and y axes using the scales option. The type: 'category' specifies that the axis is a category axis, and the labels property is an array that contains the axis labels.
You can customize the labels array to display any labels you want on the x and y axes of the heat map.
What is the process of creating a hover effect on individual data points in a heat map using Chart.js?
To create a hover effect on individual data points in a heat map using Chart.js, you can use the following steps:
- Implement a custom tooltip function in the options object of your Chart.js configuration. This function will display the desired information when a data point is hovered over.
- Add a hover event listener to the Chart.js instance, which will update the tooltip display based on the hovered data point.
- Ensure that the tooltip display is tied to the specific data point being hovered over by using the tooltip’s position and data properties.
- Customize the tooltip display as needed, such as showing additional information or changing the appearance.
By following these steps, you can create a hover effect that provides additional information on individual data points in a heat map using Chart.js.