Best Tools for 3D Chart Creation to Buy in October 2025
Weems & Plath #176 Marine Navigation Ultralight Divider
- DURABLE MARINE ALLOY & PLASTIC RESIST CORROSION FOR LASTING USE.
- EASY-TO-USE CENTER GEAR MECHANISM WITH SPARE PARTS INCLUDED.
- TRUST QUALITY WITH A LIFETIME WARRANTY-CRAFTED IN GERMANY!


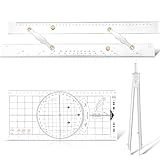
Dunzoom 3 Pcs Marine Navigation Kit, Basic Navigation Set Include 18" Marine Parallel Ruler with Clear Scales, 8" Diameter Nautical Plotter Protractor, 6" Fixed Point Divider for Boat Accessories
- COMPLETE KIT: MARINE RULER, DIVIDER, AND PROTRACTOR FOR NAVIGATION.
- DURABLE MATERIALS ENSURE RELIABLE READINGS IN ANY MARINE JOURNEY.
- USER-FRIENDLY TOOLS SIMPLIFY NAVIGATION TASKS, ENHANCING EFFICIENCY.
Saysurey Parallel Ruler Marine Navigation Tool with Clear Scales Parallel Ruler with Brushed Aluminum Arms Nautical Charts Navigation Tools for Boat Ship Drawing(12 Inch)
- EFFORTLESS, PRECISE PLOTTING FOR ACCURATE BEARINGS AND ROUTES.
- DURABLE ACRYLIC AND ALUMINUM BUILD ENSURES LONG-LASTING PERFORMANCE.
- HIGH TRANSPARENCY ENHANCES VISIBILITY FOR SMOOTH, ACCURATE MAPPING.
Motipuns 3 Pcs Basic Navigation Set, Include 16 Inch Marine Parallel Ruler with Clear Scales Navigation Divider Marine Nautical Protractor 6 Inch Marine Fixed Points Divider for Boat
- COMPLETE SET FOR ALL NAVIGATION TASKS: PROTRACTOR, RULER, DIVIDER.
- PRECISION TOOLS: STRONG, CLEAR ACRYLIC FOR ACCURATE MEASUREMENTS.
- EASY TO USE: PERFECT FOR PRACTICE AND ONBOARD NAVIGATION SKILLS.
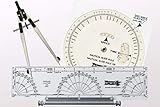
WEEMS & PLATH Essentials Navigation Kit
- ULTRALIGHT DESIGN ENHANCES PORTABILITY FOR ON-THE-GO NAVIGATION.
- PRECISION PLOTTING WITH THE WEEMS PARALLEL PLOTTER FOR ACCURACY.
- NAUTICAL SLIDE RULE SIMPLIFIES COMPLEX CALCULATIONS EFFORTLESSLY.
Weems & Plath Marine Navigation Parallel Ruler (Aluminum Arms, 15-Inch)
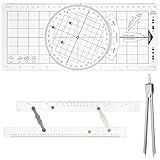
3 Pcs Basic Navigation Set, Including Marine Parallel Ruler, Nautical Protractor, and Navigation Fixed Point Divider, Marine Accessories with Clear Scales for Boat
- COMPLETE NAVIGATION SET: INCLUDES ESSENTIAL TOOLS FOR PRECISE TASKS.
- HIGH TRANSPARENCY: ACRYLIC RULER AND PVC PROTRACTOR ENSURE CLARITY.
- DURABLE & CONVENIENT: ANTI-CORROSION DIVIDER FOR EASY, ACCURATE MARKING.
RII Nautical Brass Navigation Divider, Straight Navigation Divider (Small) for Maritime & Naval, Antique Geometry Drafting Compass, Geometry Drafting Compass Professional Work with Leather Case
- DURABLE BRASS AND STAINLESS STEEL FOR LONG-LASTING, PRECISE PERFORMANCE.
- PERFECT FOR ARCHITECTS AND ARTISTS WITH DIVERSE MEASUREMENT NEEDS.
- LIGHTWEIGHT AND PORTABLE DESIGN ENSURES EASY TRANSPORT WITHOUT COMPROMISE.
Weems & Plath #317 Basic Navigation Set
- ACCURATE MEASUREMENTS WITH WEEMS PROTRACTOR FOR PRECISE NAVIGATION.
- VERSATILE 15-INCH PARALLEL RULE FOR SEAMLESS DRAWING AND DRAFTING.
- DURABLE TOOLS WITH A LIFETIME WARRANTY FOR LASTING CUSTOMER SATISFACTION.
To create a 3D chart in Chart.js, you will need to utilize the Chart.js library, which is a JavaScript charting library that allows you to create various types of charts. To make a chart 3D, you can use the chartjs-3d plugin, which extends the functionalities of Chart.js to support 3D charts.
First, you will need to include the Chart.js library and the chartjs-3d plugin in your HTML file. Next, you can create a new chart by defining a canvas element and initializing it with a Chart.js chart object. When creating the chart object, you can specify the type of 3D chart you would like to create, such as a bar chart or a line chart.
You can customize the appearance of your 3D chart by setting various options, such as the colors, labels, and data values. Additionally, you can add interactivity to your chart by enabling features like tooltips, legend, and animations.
Overall, creating a 3D chart in Chart.js involves including the necessary libraries, defining a chart object, customizing its appearance, and adding interactive features. With these steps, you can easily create stunning 3D charts to visualize your data in a dynamic and engaging way.
How to create a bar chart using Chart.js?
To create a bar chart using Chart.js, follow these steps:
- Include Chart.js in your HTML file:
- Create a canvas element in your HTML file where the chart will be rendered:
- Create a script tag in your HTML file and write JavaScript code to create the bar chart:
- Customize the chart by modifying the data and options in the JavaScript code. You can change the labels, datasets, colors, and other properties to suit your needs.
- Run your HTML file in a browser to see the bar chart rendered on the canvas element.
That's it! You have successfully created a bar chart using Chart.js. You can explore more features and customization options provided by Chart.js in the official documentation: https://www.chartjs.org/docs/latest/.
What is the functionality of tooltips in a Chart.js chart?
Tooltips in a Chart.js chart are small pop-up boxes that appear when a user hovers over or clicks on a data point in the chart. They provide additional information about the data point, such as the exact value, label, or any other metadata associated with it. This helps users to better understand the data being visualized and make more informed decisions based on the information provided by the chart. Users can often customize the appearance and content of tooltips to suit their specific needs and preferences.
What is the default animation duration in Chart.js?
The default animation duration in Chart.js is 1000 milliseconds (1 second).
How to create a scatter plot using Chart.js?
To create a scatter plot using Chart.js, you can follow these steps:
- First, include Chart.js library in your HTML file. You can either download Chart.js from the Chart.js website or link to it from a CDN.
- Create a canvas element in your HTML file where you want to display the scatter plot.
- Create a JavaScript function to draw the scatter plot using Chart.js. In this function, you will define the data and options for the scatter plot.
var ctx = document.getElementById('scatterPlot').getContext('2d'); var scatterChart = new Chart(ctx, { type: 'scatter', data: { datasets: [{ label: 'Scatter Plot', data: [ { x: 10, y: 20 }, { x: 15, y: 25 }, { x: 20, y: 30 }, // Add more data points here ] }] }, options: { scales: { x: { type: 'linear', position: 'bottom' }, y: { type: 'linear', position: 'left' } } } });
- Customize the scatter plot by adding more data points, changing labels, colors, and other options as needed.
- Call the JavaScript function to draw the scatter plot when the page loads.
window.onload = function() { drawScatterPlot(); };
- Save your HTML file and open it in a web browser to see the scatter plot created using Chart.js.
That's it! You have successfully created a scatter plot using Chart.js. You can further customize the scatter plot by referring to the Chart.js documentation and experimenting with different options and configurations.
What is the difference between Canvas and SVG in Chart.js?
Canvas and SVG are both used in Chart.js for rendering charts, but they have some key differences.
Canvas:
- Canvas is a HTML5 element that is used for drawing graphics on a web page using JavaScript.
- Charts rendered with Canvas are typically faster and more performant, especially for larger datasets.
- Canvas is pixel-based, which means the chart is rendered as a bitmap image. This can lead to lower quality graphics when zoomed in or printed.
- Canvas is ideal for applications that require real-time data updates or animations.
SVG (Scalable Vector Graphics):
- SVG is also a HTML5 element that is used for drawing graphics on a web page, but it renders vector graphics instead of bitmaps.
- SVG charts have better quality graphics, especially when zoomed in or printed.
- SVG allows for better accessibility and interactivity, as each element in the chart is an individual DOM element that can be styled and interacted with separately.
- SVG charts are slower and less performant than Canvas for large datasets.
In summary, Canvas is better suited for performance-critical applications with large datasets, while SVG is better for applications that require high-quality graphics and interactivity. Ultimately, the choice between Canvas and SVG in Chart.js will depend on the specific requirements of the project.