Best Chart Creation Tools to Buy in October 2025
Rose Book of Bible Charts, Maps, and Time Lines


NELOMO 11.8” X 7.9” Toolbox Reference Card Toolbox Accessories Conversion Chart Card SAE Metric Ruler Standard Metric Conversion Charts Tap Drill Sizes Wrench Conversion Chart
- ALL-IN-ONE REFERENCE FOR QUICK UNIT CONVERSIONS AND DRILL SIZES.
- DURABLE, LAMINATED CARD WITHSTANDS TOLL WEAR FOR LONG-TERM USE.
- PORTABLE DESIGN FITS ANY TOOLBOX, PERFECT FOR ON-THE-GO PROJECTS.

General Tools 715 Tap and Drill Reference Table
-
DOUBLE SIDED FUNCTIONALITY: TAP DRILL CHART AND DECIMAL EQUIVALENTS IN ONE TOOL.
-
EASY MEASUREMENTS: 6-INCH RULER GRADUATED IN 64THS FOR PRECISE READINGS.
-
VERSATILE COMPATIBILITY: WORKS WITH VARIOUS THREADS FOR ALL YOUR PROJECTS.
All-in-One Quilter's Reference Tool: Updated
- COMPREHENSIVE GUIDE FOR ALL QUILTING TECHNIQUES AND TIPS.
- UPDATED CHARTS AND REFERENCES FOR ACCURATE MEASUREMENTS.
- USER-FRIENDLY LAYOUT FOR QUICK ACCESS AND EASY NAVIGATION.
The Living Legacy of Trauma Flip Chart: A Psychoeducational In-Session Tool for Clients and Therapists
The CBT Flip Chart: An Evidence-Based Psychoeducational Tool for Anxiety, Depression, Stress, Insomnia, PTSD, and More
How to Read a Nautical Chart, 2nd Edition (Includes ALL of Chart #1): A Complete Guide to Using and Understanding Electronic and Paper Charts
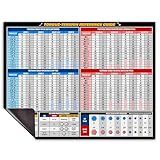
Torque Chart Magnet – SAE & Metric Screw Size Chart for Bolts – Tool Poster with Thread Chaser Info – Wrench Interchange + Conversion Chart Magnet – 8.5" x 11" Mechanic Magnet for Toolbox or Garage
-
DUAL SIZING CHARTS: COVERS SAE & METRIC FOR EFFORTLESS REFERENCE.
-
SHOP MAGNET: ORGANIZE TOOLS EASILY WITH STRONG, DURABLE MAGNETS.
-
COMPACT DESIGN: FITS TIGHT SPACES, PERFECT FOR ANY MECHANIC TOOLKIT.
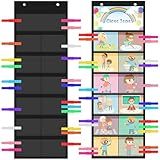
Reallnaive 2 Set Pocket Chart for Classroom, 2 Class Jobs Pocket Chart with 24 Wooden Clips Classroom Management Tools Behavior Clip Tool for Class Management Educational Behavior(Black)
-
VERSATILE USE: PERFECT FOR CLASSROOMS, HOMES, AND CHILDCARE SETTINGS.
-
CUSTOMIZABLE DESIGN: DIY OPTIONS ALLOW FOR PERSONALIZED EXPRESSION.
-
DURABLE & SAFE: MADE FROM PREMIUM OXFORD CLOTH AND TRANSPARENT PVC.
To create a funnel chart in Chart.js, you will first need to include the Chart.js library in your HTML file. Then, you can create a canvas element and specify a width and height for your chart. Next, you will need to instantiate a new Chart object, passing in the canvas element and specifying the type of chart as 'funnel'.
After that, you can define the data for your funnel chart by passing in an array of objects with 'label' and 'value' properties. You can customize the appearance of your funnel chart by changing various options such as colors, axis labels, and tooltips. Finally, you can render the chart by calling the 'update' method on your Chart object.
How to create a dynamic funnel chart in Chart.js?
To create a dynamic funnel chart in Chart.js, you can follow these steps:
- Install Chart.js: First, make sure you have Chart.js installed in your project. You can do this by including the Chart.js library in your HTML file or by installing it via npm.
- Create a canvas element: Add a canvas element to your HTML file where you want to display the funnel chart.
- Create a data array: Define an array to store the data points for the funnel chart. Each data point should consist of a label and a value.
- Create a options object: Define an options object for the funnel chart. You can customize the appearance of the chart by setting properties such as colors, labels, and tooltips.
- Create a funnel chart: Use the Chart.js library to create a new funnel chart instance on the canvas element and pass in the data array and options object.
- Update the data dynamically: To make the funnel chart dynamic, you can update the data array with new data points and then call the update() method on the chart instance to redraw the chart with the updated data.
Here's an example code snippet to create a dynamic funnel chart in Chart.js:
This code will create a dynamic funnel chart with randomly generated data points that update every 3 seconds. You can customize the chart further by adding more styling options or changing the update interval.
How to create a clickable funnel chart in Chart.js?
To create a clickable funnel chart in Chart.js, you can follow these steps:
- Install Chart.js library in your project. You can do this by including the Chart.js CDN link in your HTML file or by installing it using npm or yarn.
- Create a canvas element in your HTML file where you want to display the funnel chart.
- Create a data object for your funnel chart. This object should contain the labels and data values for each segment of the funnel.
const data = { labels: ['Stage 1', 'Stage 2', 'Stage 3', 'Stage 4', 'Stage 5'], datasets: [{ data: [100, 75, 50, 25, 10], backgroundColor: [ 'rgba(255, 99, 132, 0.6)', 'rgba(54, 162, 235, 0.6)', 'rgba(255, 206, 86, 0.6)', 'rgba(75, 192, 192, 0.6)', 'rgba(153, 102, 255, 0.6)' ] }] };
- Create a funnel chart using the Chart.js library and pass the data object as a parameter.
const ctx = document.getElementById('funnelChart').getContext('2d');
const funnelChart = new Chart(ctx, { type: 'funnel', data: data });
- Add event listeners to make the chart segments clickable. You can use the getElementAtEvent method to get the index of the clicked segment and perform an action based on that.
canvas.onclick = function(evt) { var activePoints = funnelChart.getElementsAtEvent(evt); if (activePoints[0]) { var clickedSegmentIndex = activePoints[0]._index; console.log('You clicked on segment ' + clickedSegmentIndex); // Perform any action based on the clicked segment index } };
By following these steps, you can create a clickable funnel chart in Chart.js and customize the behavior when segments are clicked.
What is the default animation duration for a funnel chart in Chart.js?
The default animation duration for a funnel chart in Chart.js is 1000 milliseconds or 1 second.
What is the advantage of using a funnel chart in Chart.js?
One advantage of using a funnel chart in Chart.js is that it allows you to visualize and track the progression of data through different stages or categories. Funnel charts are particularly useful for showing the steps in a process or the conversion rates of a sales funnel. This type of chart helps to highlight the biggest drop-offs in the data and identify areas for improvement. Additionally, funnel charts are visually appealing and can quickly convey information to viewers in a clear and concise manner.
How to export a funnel chart as an image in Chart.js?
To export a funnel chart as an image in Chart.js, you can use the toBase64Image() method provided by the chartjs-plugin-html2canvas plugin. Here's a step-by-step guide on how to do it:
- Install the chartjs-plugin-html2canvas plugin by running the following npm command:
npm install chartjs-plugin-html2canvas --save
- Import the plugin in your Chart.js file:
import Chart from 'chart.js'; import 'chartjs-plugin-html2canvas';
- Add the following options to your Chart.js configuration to enable exporting as an image:
options: { plugins: { html2canvas: { enabled: true, onAfterDraw(chart, args, options) { chart.toBase64Image({ format: 'jpeg', quality: 0.8, width: chart.width, height: chart.height }) .then((dataUrl) => { console.log(dataUrl); }); } } } }
- Replace the console.log(dataUrl) with the code to save the image, for example:
var a = document.createElement('a'); a.href = dataUrl; a.download = 'funnel_chart.jpeg'; a.click();
- Now, when you view your funnel chart in the browser, the image of the funnel chart will be automatically downloaded as a JPEG file when the chart is rendered.
By following these steps, you can easily export a funnel chart as an image in Chart.js using the chartjs-plugin-html2canvas plugin.
How to add tooltips to a funnel chart in Chart.js?
To add tooltips to a funnel chart in Chart.js, you can use the tooltips property in the options object when creating the chart. Here is an example code snippet that demonstrates how to add tooltips to a funnel chart:
var ctx = document.getElementById('myChart').getContext('2d');
var myChart = new Chart(ctx, { type: 'horizontalFunnel', data: { labels: ['Step 1', 'Step 2', 'Step 3', 'Step 4'], datasets: [{ data: [300, 200, 100, 50], backgroundColor: ['#FF6384', '#36A2EB', '#FFCE56', '#4BC0C0'] }] }, options: { tooltips: { callbacks: { label: function(tooltipItem, data) { return data.labels[tooltipItem.index] + ': ' + data.datasets[0].data[tooltipItem.index]; } } } } });
In the above code snippet, we are creating a horizontal funnel chart with four steps and custom data values. We are also specifying a custom tooltip label using the callbacks property inside the tooltips object in the options. This label function simply returns the label of the step along with its corresponding data value.
You can customize the tooltip appearance further by using other options provided by Chart.js, such as backgroundColor, borderColor, borderWidth, etc. Check the Chart.js documentation for more information on customizing tooltips.