Best Ajax URL Tools to Buy in October 2025
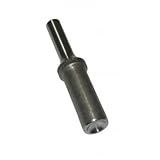
Ajax Tools 875 Flange Wedge Straight
- DURABLE CARBON STEEL CONSTRUCTION FOR LONG-LASTING PERFORMANCE.
- FORGED DESIGN ENSURES MAXIMUM TOUGHNESS AND RELIABILITY.
- PROUDLY MADE IN THE USA FOR TRUSTED QUALITY AND CRAFTSMANSHIP.


Ajax Tool Works A1620 Rivet Set F/ 3/16In. Brazier Head Rivets
- PROUDLY MADE IN THE USA FOR QUALITY AND RELIABILITY.
- COMPACT DESIGN: 5.5 X 2.8 FITS ANY SPACE EASILY.
- LIGHTWEIGHT AT 1.2 LBS FOR CONVENIENT PORTABILITY.
Ajax Tools 876 Banana Wedge 13/16" x 13/16" x 13/16" x 12"
- VERSATILE BANANA WEDGE DESIGN FOR STABLE SUPPORT IN ANY SETUP.
- DURABLE 13/16 MATERIAL ENSURES LONG-LASTING PERFORMANCE.
- LIGHTWEIGHT AND EASY TO HANDLE FOR QUICK, EFFICIENT OPERATIONS.
Ajax Tool Works A1605 Rivet Set 1/4 Round
- MEETS CUSTOMER NEEDS FOR OPTIMAL SATISFACTION AND RELIABILITY.
- USER-FRIENDLY DESIGN ENSURES EFFORTLESS OPERATION FOR EVERYONE.
- QUALITY SOLID RIVETS INCLUDED FOR ENHANCED DURABILITY AND PERFORMANCE.

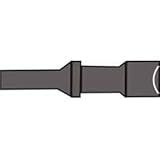
Ajax Tool Works - Rivet Cutter (A912)
- COMPACT DESIGN FITS EASILY IN YOUR VEHICLE'S STORAGE SPACES.
- LIGHTWEIGHT (0.3 LBS) FOR EASY HANDLING AND INSTALLATION.
- IMPORTED QUALITY FROM CHINA, ENSURING RELIABLE PERFORMANCE.
Ajax Tool Works AJXA1621 Rivet Set For Brazier Head Rivets, 1/4"
- PROUDLY MADE IN THE USA FOR QUALITY YOU CAN TRUST.
- COMPACT SIZE: PERFECT FIT FOR ANY SPACE AT 9.5 X 4.75 X 3.
- LIGHTWEIGHT DESIGN AT JUST 1.25 LB FOR EASY HANDLING.
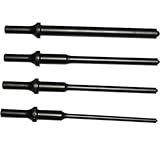
Ajax Tool Works A1106 Pneumatic Bit Set, 4 Piece, 1/4 To 1/2 Roll Pin Drivers, .401 Shank Turn Type. Length 7-1/2
Ajax Tool Works A1610 Mod. Brazier Rivet Set, 3/16"
- EFFICIENT PNEUMATIC BIT FOR QUICK AND PRECISE RIVETING TASKS.
- LIGHTWEIGHT AT 1.2 LBS FOR EASY HANDLING AND PORTABILITY.
- COMPACT DESIGN (9.5 X 5 X 2.75) FITS ANY TOOLKIT EFFORTLESSLY.
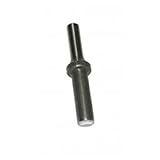
Ajax Tool Works A1604 3/16" Round Rivet
- COMPACT DESIGN FOR EASY STORAGE AND PORTABILITY.
- LIGHTWEIGHT AT JUST 1.19 LBS FOR EFFORTLESS HANDLING.
- QUALITY TOOLS FROM CHINA FOR RELIABLE PERFORMANCE AND DURABILITY.
In WordPress, calling the Ajax URL properly involves a few steps. First, you need to enqueue the jQuery library and the Ajax script in your theme's functions.php file. This can be done by using the wp_enqueue_script() function.
function enqueue_ajax_script() { wp_enqueue_script( 'jquery' ); wp_enqueue_script( 'ajax-script', get_template_directory_uri() . '/js/ajax-script.js', array( 'jquery' ), '1.0', true );
wp\_localize\_script( 'ajax-script', 'ajax\_object',
    array( 'ajax\_url' => admin\_url( 'admin-ajax.php' ) ) );
} add_action( 'wp_enqueue_scripts', 'enqueue_ajax_script' );
The above code enqueues both jQuery and the required Ajax script. It also uses the wp_localize_script() function to make the Ajax URL available to the script.
Next, create an AJAX function in your theme's functions.php file or a custom plugin.
function my_ajax_function() { // Perform any necessary actions or computations here // and return the result as an AJAX response
$response = array(
    'data' => 'Some data',
    'status' => 'success'
);

wp\_send\_json( $response );
} add_action( 'wp_ajax_my_ajax_function', 'my_ajax_function' ); add_action( 'wp_ajax_nopriv_my_ajax_function', 'my_ajax_function' );
In the above code, we define the my_ajax_function() that performs the required actions and sends the response in JSON format using the wp_send_json() function.
Lastly, in your JavaScript file (ajax-script.js), make a call to the AJAX URL.
jQuery(document).ready(function($) { $.ajax({ url: ajax_object.ajax_url, type: 'POST', data: { action: 'my_ajax_function', // Additional data to send to the server if required }, success: function(response) { // Handle the AJAX response here console.log(response); } }); });
In this code, we use the $.ajax() function to make an AJAX request to the URL provided by ajax_object.ajax_url. We set the action parameter to match the name specified in the add_action() function in the PHP code.
That's it! This is how you can properly call the AJAX URL in WordPress using these steps. Remember to replace 'my_ajax_function' with the name of your desired function.
What is the recommended debugging technique for Ajax requests on WordPress?
One recommended debugging technique for Ajax requests on WordPress is to utilize browser developer tools to track and inspect the requests. Here's a step-by-step approach:
- Open your website in a web browser (e.g., Chrome, Firefox, Safari) and right-click on the page.
- Select "Inspect" or "Inspect Element" from the contextual menu to open the developer tools.
- In the developer tools, go to the "Network" tab.
- Perform the Ajax request on the website (e.g., click a button triggering the request).
- Look for the Ajax request in the network activity panel. It will usually have a name like "admin-ajax.php" or something similar.
- Click on the request to view detailed information.
- In the request's details, check the "Headers" and "Response" tabs for any error messages, warnings, or unexpected responses.
- Debug and fix any issues detected in the Ajax request based on the information gathered in the developer tools.
Additionally, you can insert debug statements into your JavaScript code or PHP functions to log specific messages to the console or error logs to help you identify and resolve any issues.
Furthermore, WordPress provides a useful debugging feature called "WP_DEBUG" that can be enabled in the wp-config.php file. When enabled, it displays error messages, warnings, and notices related to PHP and WordPress functionality, including issues with Ajax requests. This feature can help you identify the root cause of the problem and fix it accordingly.
How to update content on a WordPress page using Ajax?
To update content on a WordPress page using Ajax, you can follow these steps:
- Enqueue jQuery: Make sure jQuery is enqueued properly in your theme's functions.php file. You can use the following code to enqueue jQuery:
function enqueue_jquery() { wp_enqueue_script('jquery'); } add_action('wp_enqueue_scripts', 'enqueue_jquery');
- Create a JavaScript file: Create a new JavaScript file in your theme's directory. You can name it something like custom-ajax.js. This file will contain the Ajax code to update content on the WordPress page.
- Write the Ajax code: Open custom-ajax.js file and write the Ajax code. Here is an example of how the code would look like:
jQuery(document).ready(function($) { $(document).on('click', '#my-button', function() { var data = { action: 'update_content', my_parameter: 'my_value' };
    $.post(ajaxurl, data, function(response) {
        $('#content-container').html(response);
    });
});
});
In this example, we're using $.post method to send an Ajax request to the server with an action (update_content) and a parameter (my_parameter).
- Handle the Ajax request on the server-side: Open your theme's functions.php file and add the following code to handle the Ajax request:
function update_content_ajax_handler() { $my_parameter = $_POST['my_parameter'];
// Perform necessary operations with $my\_parameter, e.g., database update, calculations, etc.

// Return the updated content
echo 'Updated content';

wp\_die();
}
add_action('wp_ajax_update_content', 'update_content_ajax_handler'); add_action('wp_ajax_nopriv_update_content', 'update_content_ajax_handler');
In this example, we define a update_content_ajax_handler function that retrieves the my_parameter value from the Ajax request and performs any necessary operations. Then, we echo the updated content, which will be sent back to the client-side $.post callback.
- Enqueue the JavaScript file: Open your theme's functions.php file and add the following code to enqueue the JavaScript file:
function enqueue_custom_ajax() { wp_enqueue_script('custom-ajax', get_stylesheet_directory_uri() . '/custom-ajax.js', array('jquery'), '1.0', true); } add_action('wp_enqueue_scripts', 'enqueue_custom_ajax');
That's it! You now have the necessary code to update content on a WordPress page using Ajax. Just make sure to replace #my-button and #content-container with appropriate selectors for your use case.
How to create a callback function for Ajax requests in WordPress?
To create a callback function for Ajax requests in WordPress, you can follow these steps:
- Create a new WordPress plugin or use an existing one.
- Open the plugin's main PHP file.
- Enqueue the script that will handle the Ajax request. This can be done using the wp_enqueue_script() function. For example:
function enqueue_custom_script() { wp_enqueue_script( 'custom-script', plugin_dir_url( __FILE__ ) . 'js/custom-script.js', array( 'jquery' ), '1.0', true ); } add_action( 'wp_enqueue_scripts', 'enqueue_custom_script' );
- Create a new PHP function that will handle the Ajax request and serve as the callback function:
function ajax_callback_function() { // Process the Ajax request here // You can access the request data using $_POST or $_GET
// Your code here...

// Return the response
wp\_send\_json\_success( 'Success' ); // or wp\_send\_json\_error( 'Error' );
}
- In the JavaScript file (custom-script.js in the above example), define the Ajax request using the jQuery.ajax() method:
jQuery(document).ready(function($) { // Ajax request $.ajax({ url: ajax_object.ajax_url, // This variable is defined in your PHP file using wp_localize_script() type: 'POST', data: { action: 'ajax_callback', // This is the name of the function in your PHP file // Include any additional data you want to send // Example: name: 'John' }, success: function(response) { console.log(response); // Handle the response }, error: function(errorThrown) { console.log(errorThrown); // Handle the error } }); });
- Finally, hook the PHP callback function to the appropriate WordPress action:
add_action( 'wp_ajax_ajax_callback', 'ajax_callback_function' ); // For logged-in users add_action( 'wp_ajax_nopriv_ajax_callback', 'ajax_callback_function' ); // For non-logged-in users
Make sure to replace 'ajax_callback' with the actual name of your callback function in both the JavaScript and PHP code. Additionally, customize the callback function to process the Ajax request and return the desired response.
What is the advantage of using Ajax to load more posts in WordPress?
The advantage of using Ajax to load more posts in WordPress are as follows:
- Improved User Experience: Ajax allows the content to load dynamically without refreshing the entire page. This provides a seamless and smooth experience for users as they can continue reading or browsing without any interruption.
- Faster Loading: With Ajax, only the required content is loaded, reducing the overall page load time. Users can view additional posts without having to wait for the entire page to reload each time.
- Bandwidth and Server Load Optimization: By loading only the necessary content, Ajax minimizes the bandwidth usage and reduces the strain on the server. This can be particularly beneficial for websites with large amounts of content or a high number of concurrent visitors.
- Facilitates Infinite Scroll: Ajax is commonly used for implementing infinite scroll, where new posts are automatically loaded as the user reaches the end of the current content. This eliminates the need for pagination and provides a more engaging browsing experience.
- Enhanced SEO: As Ajax loads content dynamically, search engine crawlers can easily navigate through the site and index the content effectively. This can positively impact SEO efforts and improve the visibility of the website in search engine rankings.
Overall, Ajax improves performance, usability, and can positively impact the user experience, making it a popular choice for loading more posts in WordPress.
What is the purpose of calling an Ajax URL on WordPress?
The purpose of calling an Ajax URL on WordPress is to retrieve and exchange data between the browser and the server asynchronously without requiring a page refresh. This allows for more dynamic and interactive website functionality, such as loading content without reloading the entire page, submitting forms without page redirects, or updating specific elements based on user actions. Ajax calls can be used to fetch or send data to the server, perform server-side operations, and update the user interface accordingly.
How to perform server-side validation for Ajax requests in WordPress?
To perform server-side validation for Ajax requests in WordPress, you can follow these steps:
- Define and register an action callback function in your plugin or theme's PHP file. This function will handle the Ajax request and perform the validation.
function validate_ajax_request_callback() { // Implement your validation logic here // Retrieve and sanitize the data from the Ajax request
// Perform the validation checks

// Return the validation result (success or error message) as a response

wp\_die(); // This function is used to terminate the Ajax request
} add_action( 'wp_ajax_validate_ajax_request', 'validate_ajax_request_callback' ); add_action( 'wp_ajax_nopriv_validate_ajax_request', 'validate_ajax_request_callback' );
- In your JavaScript file, create an Ajax request to the appropriate WordPress Ajax URL, passing the data you want to validate.
jQuery(document).ready(function($) { // Make an Ajax request $.ajax({ url: ajaxurl, type: 'POST', data: { action: 'validate_ajax_request', // Add more data to validate if needed }, success: function(response) { // Handle the response from the server if (response.success) { // Validation succeeded, do something } else { // Validation failed, display the error message } }, error: function(error) { // Handle any errors occurred during the Ajax request } }); });
- Update the 'validate_ajax_request' action in the Ajax request with the name of the action defined in the PHP file.
- Implement your validation logic in the server-side callback function. This can include retrieving and sanitizing the data from the Ajax request, performing any necessary checks, and returning the validation result.
- Return the validation result as a response from the server. You can use the wp_send_json_success() function to return a successful validation result or the wp_send_json_error() function to return an error result with a custom error message.
By following these steps, you will be able to perform server-side validation for Ajax requests in WordPress.
How to implement security measures for Ajax requests on WordPress?
There are several steps you can take to implement security measures for Ajax requests on WordPress:
- Nonces: Use WordPress Nonces (number used only once) to verify the authenticity of the request. Nonces are unique keys that can be generated using WordPress functions like wp_create_nonce() and added to your Ajax requests using wp_localize_script(). On the server-side, you can check the validity of the nonce using wp_verify_nonce().
- Permissions Check: Ensure that only authorized users or roles have access to your Ajax actions by checking their permissions. You can use functions like current_user_can() to verify the user's capabilities before executing the requested action.
- Validate and Sanitize Input: Always validate and sanitize any input received through Ajax requests. WordPress provides several functions for this purpose, such as sanitize_text_field() or sanitize_email(). It helps prevent malicious or unexpected inputs from compromising your website's security.
- Limit Cross-Origin Requests: By default, WordPress allows Ajax requests from any origin. However, you can add security headers to limit cross-origin requests to only specific domains. For example, you can use the wp_ajax_* and wp_ajax_nopriv_* hooks to add headers using header() functions.
- Escaping Output: Make sure to escape any output sent back through Ajax to prevent cross-site scripting (XSS) attacks. WordPress has various functions for this, such as esc_html() or esc_url().
- Rate Limiting: Implement rate limiting to limit the number of Ajax requests from a particular IP address or user within a certain time frame. This can help protect against brute-force attacks or excessive resource usage.
- Logging and Error Handling: Set up a logging mechanism to capture any errors or suspicious activities related to Ajax requests. This can help you identify and mitigate potential security threats.
Remember to regularly update your WordPress installation, themes, and plugins to ensure you have the latest security patches. Additionally, consider using a security plugin that can offer additional protection and features specific to Ajax requests.