Best Time Management Tools to Buy in October 2025
Rotating Pomodoro Timer 5, 25, 10 50 Minutes Preset, Desk Productivity Flip Timer, ADHD Tool Cube Countdown Stopwatch, Vibration/High/Low Volume/Custom Modes, for Work, Study, Back to School, Kitchen
- PRESET POMODORO TIMER: EFFORTLESSLY MANAGE TIME WITH 5 & 25-MINUTE PRESETS.
- GRAVITY SENSOR CONTROL: JUST FLIP TO START, STOP, OR RESET YOUR TIMER!
- CUSTOM & ADJUSTABLE MODES: TAILOR COUNTDOWNS FROM 00:00 TO 99:59 MINUTES.


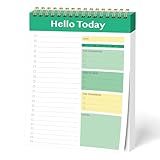
Weekly To Do List Notepad, 8.5''x11'' Weekly Desk Planners with 52 Tear Off Sheets Undated Planner Habit Tracker & Productivity Organizer for Home and Work, Pink
- START PLANNING ANYTIME WITH OUR FLEXIBLE UNDATED WEEKLY PLANNER!
- STAY ORGANIZED WITH PRIORITY SECTIONS AND A HABIT TRACKER INCLUDED!
- ENJOY SMOOTH WRITING ON THICK PAPER WITH A CONVENIENT SPIRAL DESIGN!
The Ultimate Time Management Toolkit (Ultimate Toolkits for Psychological Wellbeing)
Daily To Do List Notepad - 52 Sheets Spiral Planner Checklist Notebook Work Organizer Planning Pad Perfect for Enhanced Productivity and Tasks Goal Achievement - Green
- STAY ORGANIZED: KEEP ALL TASKS IN ONE PLACE, NO MORE STICKY NOTES!
- MULTI-SECTION DESIGN: PRIORITIZE TASKS WITH CHECKLIST AND NOTES SECTIONS.
- FLEXIBLE & PORTABLE: USE IT ANYWHERE-HOME, OFFICE, OR SCHOOL!
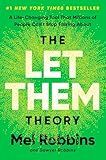
The Let Them Theory: A Life-Changing Tool That Millions of People Can't Stop Talking About
Weekly To Do List Notepad, 60 Page Task Planning Pad w/Daily Checklist, Priority Todo Checkbox & Notes. Desk Notebook to Organize Office 11 X 8.5
- ENHANCE ORGANIZATION WITH PRIORITIZED TO-DO SECTIONS FOR EFFICIENCY.
- VERSATILE DESIGN FOR HOME, OFFICE, SCHOOL, AND COLLABORATIVE TASKS.
- 60 PAGES OF QUALITY PAPER-PERFECT FOR ENDLESS TASK PRODUCTIVITY!
In Laravel, you can add two 'time' datatypes by using the Carbon library which is included in Laravel by default. First, retrieve the two time values from your database or any other source. Then, convert these time values to Carbon instances using the Carbon class. Finally, add the two time values together using the add() method provided by Carbon. You can then use the result for any further calculations or display as needed. Remember to use the format() method if you need to display the result in a specific format.
How to optimize the process of adding two 'time' data types in Laravel?
To optimize the process of adding two 'time' data types in Laravel, you can follow these steps:
- Use the built-in Carbon library: Laravel uses the Carbon library to work with dates and times. You can use Carbon's methods to perform calculations on time data efficiently.
- Use database functions: If you are working with time data stored in databases, you can use database functions like TIMESTAMPADD or TIMEDIFF to perform calculations directly in the database instead of retrieving the data to PHP and then calculating it.
- Use Laravel's query builder: If you are retrieving time data from the database and need to perform calculations on the retrieved data, you can use Laravel's query builder to perform the calculations directly in the database query.
- Cache results: If you are performing the same calculations repeatedly on the same time data, consider caching the results to avoid redundant calculations.
- Use PHP's built-in date and time functions: If you need to perform complex calculations on time data, you can use PHP's built-in date and time functions like strtotime, date_diff, or date_add to optimize the process.
By following these steps, you can optimize the process of adding two 'time' data types in Laravel and improve the performance of your application.
What is the difference between adding 'time' data types in Laravel migrations and seeders?
In Laravel migrations, the 'time' data type is used to store only the time component of a datetime value. This data type is often used in scenarios where you need to store just the time of an event or an action, without the date component.
In Laravel seeders, when you use the 'time' data type to populate your database with seed data, the values will be stored as strings in the database. This means that when you insert values using the 'time' data type in seeders, they will not be converted to actual 'time' data type in the database. The values will remain as strings representing time values.
So, the main difference is that in migrations, the 'time' data type is used to define the structure of a column as a time component of a datetime value, while in seeders, the 'time' data type is used to populate the database with time values in string format.
How to handle cascading deletes when adding 'time' data types in Laravel relationships?
When adding 'time' data types in Laravel relationships and handling cascading deletes, you can use the onDelete('cascade') method in your database migrations. This will automatically delete related records when the parent record is deleted.
For example, if you have a model relationship where a parent model hasMany child models with a 'time' data type, you can define the relationship in your model like this:
class ParentModel extends Model { public function childModels() { return $this->hasMany(ChildModel::class); } }
And in your child model, you can define the relationship like this:
class ChildModel extends Model { public function parentModel() { return $this->belongsTo(ParentModel::class); } }
Then, in your database migration for the child model, you can set the foreign key constraint to cascade on delete like this:
Schema::create('child_models', function (Blueprint $table) { $table->id(); $table->time('time_column'); $table->unsignedBigInteger('parent_model_id'); $table->foreign('parent_model_id')->references('id')->on('parent_models')->onDelete('cascade'); $table->timestamps(); });
This way, when you delete a parent model, all related child models with 'time' data types will also be deleted automatically.
What is the best practice for adding 'time' data types in Laravel resource controllers?
The best practice for adding 'time' data types in Laravel resource controllers is to use the Carbon library, which provides convenient methods for working with dates and times in PHP.
To add a 'time' data type in a Laravel resource controller, you can create a migration with a 'time' column using the schema builder's time() method, as shown below:
Schema::create('events', function (Blueprint $table) { $table->time('start_time'); $table->time('end_time'); });
In your controller, you can use the Carbon library to work with 'time' data types like so:
use Carbon\Carbon;
public function store(Request $request) { $startTime = Carbon::parse($request->input('start_time')); $endTime = Carbon::parse($request->input('end_time'));
// Save the data to the database
}
This will allow you to easily manipulate and work with 'time' data types in your Laravel resource controller.