Best Chart.js Accessories to Buy in October 2025
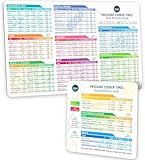
Instant Pot Cooking Times Chart - Pressure Cooker Accessories Cook Times - Easy to Use & Clean Strong Magnet Kilograms - Instant Pot Cheat Sheet Magnet Set Quick Reference Guide (White)
-
SAVE TIME: INSTANT POT CHEAT SHEET FOR 100+ FOODS-COOK EFFORTLESSLY!
-
INSTANT REFERENCE: CLEARLY LABELED INGREDIENTS FOR QUICK RETRIEVAL!
-
UNIVERSAL FIT: COMPATIBLE WITH ALL MAJOR BRANDS FOR CONVENIENCE!


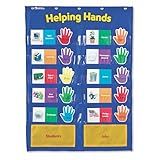
Learning Resources Helping Hands Pocket Chart, 30 Card, Classroom Organization, Teacher Accessories,Teacher Supplies for Classroom,Back to School Supplies
- BOOST TEAMWORK AND CONFIDENCE WITH CUSTOMIZABLE CLASS JOB CARDS!
- FOSTER SENSORY SKILLS AND MOTOR DEVELOPMENT THROUGH ENGAGING TOYS!
- TRUSTED BY EDUCATORS SINCE 1984-PERFECT GIFTS FOR EVERY OCCASION!
To add a chart with a table in Chart.js, you can follow these steps:
- First, ensure that you have included the Chart.js library in your HTML file. You can download it from the official Chart.js website or use a CDN link.
- Create a canvas element in your HTML file where you want to render the chart. Give it an ID to reference it later on.
- In your JavaScript code, select the canvas element using its ID using document.getElementById('yourCanvasId').
- Define your chart data and options. You can create an array of data for the chart and customize various aspects of the chart, such as the type, labels, colors, etc.
- To add a table along with the chart, consider using an HTML table element. You can create a table structure using HTML tags and populate it with the required data.
- Once your data and table are ready, you can use the JavaScript context API of Chart.js, accessed as canvasElement.getContext('2d'), to create a new instance of the chart. Pass the required data and options as parameters to configure the chart.
- Additionally, you can use the .generateLegend() method to generate a legend for the chart, if needed. This method returns an HTML string that can be used to display the legend along with the chart.
- Finally, use JavaScript to append the table structure to the desired location in your HTML document. You can use methods like appendChild() to accomplish this.
By following these steps, you can add a chart with a table in Chart.js and effectively display data in a graphical and tabular format on your web page.
How to load data from an external source into a Chart.js chart?
To load data from an external source into a Chart.js chart, follow these steps:
- Create an HTML file and include the Chart.js library by adding the following script tag in the head section:
- Create a canvas element where you want to display the chart:
- Create a JavaScript file and write the code to fetch the data from the external source. For example, you can use the Fetch API to make an AJAX request:
fetch('data.json') .then(response => response.json()) .then(data => { // Code to populate Chart.js data // Call a function to create the chart and pass the data createChart(data); }) .catch(error => console.error(error));
- Write a function to create the chart using the Chart.js library. In this function, you can specify the chart type, data, and options:
function createChart(data) { // Get the canvas element const ctx = document.getElementById('myChart').getContext('2d');
// Create the chart using Chart.js new Chart(ctx, { type: 'bar', // Specify the chart type (e.g., bar, line, pie, etc.) data: { labels: data.labels, // Data labels datasets: [{ label: 'Data', // Dataset label data: data.values, // Data values backgroundColor: 'rgba(0, 123, 255, 0.5)', // Color of bars, lines, etc. borderColor: 'rgba(0, 123, 255, 1)', // Border color borderWidth: 1 // Border width }] }, options: { // Specify chart options (e.g., title, scales, tooltips, etc.) } }); }
- Save the JavaScript file and link it to the HTML file by adding the following script tag just before the closing body tag:
- Finally, create a JSON file (e.g., data.json) that contains the data you want to load into the chart. Make sure the JSON file is accessible from the same domain as your HTML file.
Now, when you open the HTML file, the JavaScript code will fetch the data from the JSON file and create a Chart.js chart using that data.
How to add a title to a Chart.js chart?
To add a title to a Chart.js chart, you can use the title property of the chart configuration object. Here's an example of how you can add a title to a chart:
var chartOptions = { type: 'bar', data: { labels: ["Red", "Blue", "Yellow", "Green", "Purple", "Orange"], datasets: [{ label: '# of Votes', data: [12, 19, 3, 5, 2, 3], backgroundColor: [ 'rgba(255, 99, 132, 0.2)', 'rgba(54, 162, 235, 0.2)', 'rgba(255, 206, 86, 0.2)', 'rgba(75, 192, 192, 0.2)', 'rgba(153, 102, 255, 0.2)', 'rgba(255, 159, 64, 0.2)' ], borderColor: [ 'rgba(255, 99, 132, 1)', 'rgba(54, 162, 235, 1)', 'rgba(255, 206, 86, 1)', 'rgba(75, 192, 192, 1)', 'rgba(153, 102, 255, 1)', 'rgba(255, 159, 64, 1)' ], borderWidth: 1 }] }, options: { plugins: { title: { display: true, text: 'Chart Title' } } } };
var myChart = new Chart(document.getElementById('myChart'), chartOptions);
In this example, the options object includes the title object under the plugins property. The title object contains the display property set to true to display the title and the text property set to the desired title text.
Make sure to replace 'myChart' with the ID of your chart canvas element.
This will add a title to your Chart.js chart.
How to create a radar chart in Chart.js?
To create a radar chart in Chart.js, you need to follow these steps:
- Include the Chart.js library in your HTML file.
- Create a canvas element in your HTML where you want to render the radar chart.
- Initialize the chart using JavaScript. var ctx = document.getElementById('myChart').getContext('2d'); var myChart = new Chart(ctx, { type: 'radar', data: { labels: ['Label 1', 'Label 2', 'Label 3', 'Label 4', 'Label 5'], datasets: [{ label: 'Dataset', data: [10, 20, 30, 40, 50], // The data values for the chart backgroundColor: 'rgba(0, 123, 255, 0.5)', // The color of the data area borderColor: 'rgba(0, 123, 255, 1)', // The color of the data border borderWidth: 1 // The width of the data border }] }, options: { scale: { ticks: { beginAtZero: true // Start the scale at 0 } } } });
- Customize the chart appearance and behavior by modifying the data and options objects. For example, you can change the colors, add multiple datasets, and configure the scale ticks.
- The radar chart should now be displayed on your webpage.
Note: You can refer to the Chart.js documentation for more advanced customization options and features: https://www.chartjs.org/docs/latest/charts/radar.html
What is the role of the scale in a Chart.js chart?
The scale in a Chart.js chart is responsible for creating and managing the axes that are used to display data. It defines the type of scale (such as linear, logarithmic, or time), determines the range and boundaries of the chart, and calculates the positions of the ticks and labels on the axes.
The scale helps to convert the raw data values to pixel positions on the chart, allowing the data to be accurately represented and interpreted visually. It also allows for customization and configuration of various options such as tick intervals, labels, axis lines, and grid lines.
Overall, the scale is a fundamental component of a Chart.js chart that helps to define the visualization of data in a meaningful and informative way.