Best SSL Certificates to Buy in October 2025

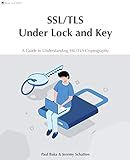
SSL/TLS Under Lock and Key: A Guide to Understanding SSL/TLS Cryptography


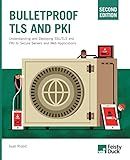
Bulletproof TLS and PKI, Second Edition: Understanding and Deploying SSL/TLS and PKI to Secure Servers and Web Applications


FREE SSL CERTIFICATES: Secure your Web server with free Let's Encrypt Certificates Guide to fully automate the process of creating and renewing certificates. (CTS SOLUTIONS IT-PRO E-Books Book 4)


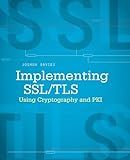
Implementing SSL / TLS Using Cryptography and PKI


SSL server certificate creation manual for CentOS 8/7 (Japanese Edition)


Mastering NGINX Second Edition


My own Certificate Authority: Create your own graphical CA for Intranets with Open Source Software for Windows, Linux and MAC (CTS SOLUTIONS IT-PRO E-Books Book 1)


Secure Your WordPress Website with HTTPS for free: A Visual Step-by-Step Guide to Securing Your Website with SSL (Webmaster Series)


IIS Essentials: From Installation to Maintenance - The Ultimate Guide: Unleashing the Power of Your Web Server


Mastering Let's Encrypt: Securing Your Websites for Free


To redirect to HTTPS in WordPress, you can follow these steps:
- Update the WordPress Address and Site Address in the General Settings to start with "https://" instead of "http://".
- Install a SSL certificate on your server to enable HTTPS on your website.
- Use a plugin like Really Simple SSL or WP Force SSL to automatically redirect all traffic to HTTPS.
- Update any hardcoded links in your content, such as images or links, to use the HTTPS protocol.
- Test your website to ensure that all pages are properly redirecting to HTTPS.
What is a SSL chain and why is it important for HTTPS on WordPress?
An SSL chain, also known as a Certificate Chain, is a hierarchy of trust that verifies the authenticity of an SSL certificate. It consists of multiple certificates starting with the server's SSL certificate and ending with the root certificate authority (CA) certificate. Each certificate in the chain is digitally signed by the next certificate in the hierarchy, ultimately linking back to the root CA certificate.
Having a proper SSL chain is important for HTTPS on WordPress because it ensures that the SSL certificate presented by the server is trusted and valid. When a user visits a website using HTTPS, their browser checks the SSL chain to verify that the website's SSL certificate is issued by a trusted CA. If the SSL chain is incomplete or incorrectly configured, the browser may display security warnings to the user, potentially scaring them away from the website.
In order to maintain a secure and trusted HTTPS connection on WordPress, it is essential to properly configure the SSL chain by including all necessary intermediate certificates in the SSL certificate configuration. This ensures that the SSL certificate is recognized and trusted by all major browsers, providing a secure and seamless browsing experience for users.
What is the difference between HTTP and HTTPS?
HTTP (Hypertext Transfer Protocol) and HTTPS (Hypertext Transfer Protocol Secure) are both protocols used for transferring data over the internet. The main difference between the two is the security aspect.
HTTP transmits data over the internet in plain text, which means that any data sent using HTTP can be intercepted and read by hackers or other malicious parties. This lack of encryption makes HTTP vulnerable to security threats.
HTTPS, on the other hand, uses encryption to secure the data transferred between the user's browser and the website server. This encryption makes it much more difficult for hackers to intercept and read the data. HTTPS is often used for websites that handle sensitive information such as personal details, financial transactions, or login credentials.
In summary, the key difference between HTTP and HTTPS is that HTTP is not secure, while HTTPS provides a secure way to transfer data over the internet.
How to secure my WordPress site with HTTPS?
To secure your WordPress site with HTTPS, you can follow these steps:
- Obtain an SSL certificate: Purchase an SSL certificate from a trusted certificate authority (CA) or get a free SSL certificate from services like Let's Encrypt.
- Install the SSL certificate: Depending on your hosting provider, you may need to install the SSL certificate manually or through your hosting control panel. Some hosting providers also offer automatic SSL installation.
- Update your WordPress site URL: Go to your WordPress dashboard, navigate to Settings > General, and update both the WordPress Address (URL) and Site Address (URL) to use HTTPS instead of HTTP.
- Update any hardcoded URLs: Check your theme files, plugins, and database for any hardcoded HTTP URLs and update them to HTTPS. You can use a plugin like Really Simple SSL to automatically update these URLs.
- Enable HTTPS redirection: Redirect all HTTP traffic to HTTPS by adding a redirect rule in your .htaccess file or by using a plugin like Really Simple SSL.
- Test your website: Use an online tool like Why No Padlock or SSL Labs to check if your SSL certificate is installed correctly and if there are any mixed content issues on your site.
- Stay updated: Regularly check for updates to your SSL certificate, WordPress core, themes, and plugins to ensure that your site remains secure.
By following these steps, you can secure your WordPress site with HTTPS and protect your visitors' data from being intercepted or compromised.
