Best Shipping Management Tools to Buy in October 2025
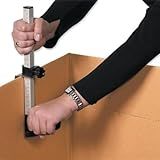
Box Resizer Tool with Scoring Wheel - Cardboard Box reducer to Customize Shipping Boxes - Box scorer Tool
- CUSTOMIZABLE BOX SIZES WITH EASY MEASURING GUIDES.
- EFFORTLESSLY PERFORATES CORRUGATED CARDBOARD WITH SHARP BLADE.
- SIMPLE SIZE ADJUSTMENTS WITH CLEAR MARKINGS ON TOOL.


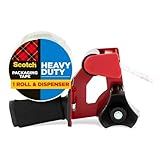
1.88 in x 66.6 YDs Clear Heavy Duty Packing Tape with Dispenser, Strong & Durable Shipping Tape, Packaging Tape, Packing Tape Dispenser for Packing Boxes, Moving Supplies, Shipping and Mailing
- STRONG BONDING POWER: SECURELY SEALS BOXES FOR SAFE SHIPPING.
- STREAMLINED APPLICATION: INNOVATIVE DISPENSER FOR QUICK, EASY USE.
- COST-EFFECTIVE SIZE: 1.88 WIDTH, 66.6 YDS-PERFECT FOR ALL PACKING NEEDS!
TICONN Stretch Wrap Stretch Film Roll, 1000ft Industrial Strength 15 inch Wide Clear Plastic Wrap with Handles for Pallet Wrapping Shipping Moving
-
SUPERIOR STRENGTH: THICK, ODORLESS MATERIAL FOR MAXIMUM PROTECTION.
-
STRETCH UP TO 300%: FLEXIBLE WRAP ENSURES SAFE SHIPPING AND STORAGE.
-
EASY HANDLING: INCLUDED HANDLES SIMPLIFY WRAPPING FOR EFFICIENT MOVING.
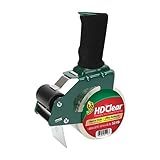
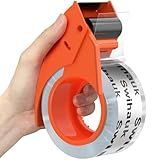
Duck HD Clear Packing Tape Dispenser Heavy Duty Packaging Tape Gun for Packing Boxes, Shipping and Moving - Includes 1 Refill Roll of HD Clear 1.88 In. x 50 Yards - Foam Handle (287398)
- ULTRA-STRONG ADHESION: HOLDS TIGHT OVER TIME FOR SECURE PACKING.
- VERSATILE USE: PERFECT FOR WAREHOUSES, GARAGES, AND HOME ORGANIZATION.
- CRYSTAL CLEAR FINISH: PROFESSIONAL LOOK FOR SHIPPING AND LABELING NEEDS.
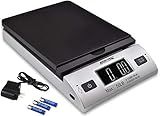
ACCUTECK All-in-1 Series W-8250-50bs A-Pt 50 Digital Shipping Postal Scale with Ac Adapter, Silver
-
VERSATILE DESIGN: STANDS UPRIGHT FOR EASY WEIGHING OF IRREGULAR PACKAGES.
-
ALWAYS ON: AC ADAPTER KEEPS THE SCALE POWERED FOR CONTINUOUS USE.
-
ACCURATE READINGS: SELF-CALIBRATION & MULTIPLE MODES FOR PRECISE MEASUREMENTS.
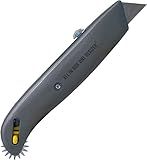
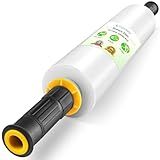
Box Resizer Tool with Scoring Wheel - Utility Knife Cardboard Scorer, Reducer - Box Cutter Sizer Tool for Resizing Reducing Size of Shipping Boxes
- VERSATILE TOOL: RESIZES BOXES, OPENS PACKAGES, AND CUTS EASILY.
- ECO-FRIENDLY DESIGN: SAVE COSTS BY REUSING AND REDUCING WASTE.
- CONVENIENT REPLACEABLE BLADE: EASY TO SWITCH WITH SK5 UTILITY BLADES.

70 Sheets Newsprint Packing Paper Sheets for Moving, Shipping, Box Filler, Wrapping and Protecting Fragile Items 1.8 Lbs (26” x 15”)
-
PERFECT FOR FRAGILE ITEMS: CONFORMS TO PROTECT GLASSES, DISHES, & MORE.
-
DURABLE & ECO-FRIENDLY: STRONG, RECYCLABLE SHEETS REDUCE WASTE EFFECTIVELY.
-
MULTI-FUNCTIONAL USE: IDEAL FOR PACKING, ART PROJECTS, AND CREATIVITY!
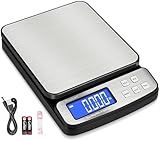
Fuzion Digital Shipping Postal Scale - 88lb x 0.1oz, Stainless Steel Platform, 5 Units, Hold/Tare/PCS Counting, Easy Calibration, Large LCD, Scale for Packages, All-in-1 Shipping Scale
- DURABLE DESIGN WITH STAINLESS STEEL PLATFORM FOR DAILY USE.
- ACCURATE WEIGHING UP TO 88 LB WITH MINIMAL START WEIGHT OF 10G.
- EASY CALIBRATION AND USER-FRIENDLY INTERFACE FOR FAST OPERATION.
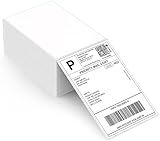
MUNBYN Thermal Direct Shipping Label (Pack of 500 4x6 Per Fanfold Labels) - Commercial Grade
-
WIDE COMPATIBILITY: WORKS WITH TOP PRINTERS, ENSURING SEAMLESS USAGE.
-
RELIABLE DELIVERY: ANTI-JAM DESIGN MINIMIZES MISDELIVERY RISKS, BOOSTING TRUST.
-
ECO-FRIENDLY: FSC-CERTIFIED LABELS REDUCE WASTE WHILE SAVING COSTS.
Scotch Heavy Duty Packaging Tape, 1.88 x 54.6 yd, Designed for Packing, Shipping and Mailing, Strong Seal on All Box Types, 3" Core, Clear, 1 Roll w/Dispenser (3850-2ST)
- INDUSTRIAL-STRENGTH ADHESIVE ENSURES SECURE SEALING IN TOUGH CONDITIONS.
- ONE STRIP IS ALL YOU NEED FOR RELIABLE, HASSLE-FREE BOX SEALING.
- VERSATILE TAPE WORKS ON ALL BOX TYPES, INCLUDING RECYCLED MATERIALS.
To manage shipping settings on Shopify, you'll first need to access your admin dashboard and navigate to the "Settings" section. From there, click on "Shipping" to adjust your shipping rates and methods. You can set up different shipping zones, create custom shipping rates, and even offer free shipping on orders over a certain amount. It's important to regularly review and update your shipping settings to ensure that they align with your business needs and provide a positive experience for your customers. Shopify offers a variety of tools and resources to help you streamline your shipping process and maximize customer satisfaction.
How to set up shipping notifications on Shopify?
To set up shipping notifications on Shopify, follow these steps:
- Log in to your Shopify admin dashboard.
- Click on "Settings" in the bottom left-hand corner of the page.
- Click on "Notifications" under the "Settings" menu.
- In the "Order notifications" section, you can customize the notifications that are sent to your customers when their order is fulfilled and shipped.
- Click on "Edit" next to the "Fulfillment request" notification to customize the email that is sent to customers when their order is fulfilled and ready to be shipped.
- In the email editor, you can customize the subject line, content, and design of the email. You can also include dynamic variables like the customer's name, order number, and tracking information.
- Click on "Edit" next to the "Shipping update" notification to customize the email that is sent to customers when their order is shipped.
- In the email editor, you can customize the subject line, content, and design of the email. You can also include dynamic variables like the customer's name, order number, and tracking information.
- Once you have customized the notifications to your liking, click on "Save" to save your changes.
That's it! Your shipping notifications are now set up on Shopify and will be automatically sent to your customers when their orders are fulfilled and shipped.
How to manage shipping preferences for specific products on Shopify?
To manage shipping preferences for specific products on Shopify, follow these steps:
- Log in to your Shopify admin dashboard.
- Go to the "Products" section in the sidebar menu.
- Click on the specific product you want to manage shipping preferences for.
- Scroll down to the "Shipping" section in the product details page.
- Select "Edit" next to the shipping options.
- Choose a shipping method for the product, such as flat rate, carrier calculated rates, or free shipping.
- Set the shipping rates and options specific to that product, such as weight-based shipping rates or shipping zones.
- Save your changes.
By following these steps, you can customize the shipping preferences for specific products on Shopify to meet the needs of your customers and ensure accurate shipping costs are applied at checkout.
What is the best way to handle international shipping on Shopify?
There are several best practices for handling international shipping on Shopify:
- Set up multiple shipping zones: Shopify allows you to create different shipping zones for different regions or countries. This way, you can customize shipping rates and options based on the location of your customers.
- Offer multiple shipping options: Provide your customers with various shipping methods, such as standard, expedited, or express shipping. This allows them to choose the option that best fits their needs and budget.
- Use a reliable shipping carrier: Partner with a reputable shipping carrier that offers international delivery services and has a good track record of reliable and timely deliveries.
- Clearly communicate shipping costs and delivery times: Be transparent about shipping costs and estimated delivery times for international orders. This helps manage customer expectations and prevents any surprises or delays.
- Provide tracking information: Offer package tracking for international orders so that customers can monitor the status of their shipment and know when to expect delivery.
- Consider offering free shipping: To incentivize international customers to make a purchase, consider offering free shipping for orders over a certain amount.
- Stay updated on customs regulations: Be aware of customs regulations and import duties for different countries to avoid any delays or complications with international shipments.
By following these best practices, you can ensure a smooth and positive shipping experience for your international customers on Shopify.