
Best Cookie Plugins to Buy in October 2025
Glade PlugIns Refills Air Freshener, Scented and Essential Oils for Home and Bathroom, Cookie Caramel Rush, 3.35 Fl Oz, 5 Count
- INDULGE IN COOKIE CARAMEL RUSH: A SWEET, COZY AROMA EXPERIENCE!
- LIMITED EDITION HOLIDAY SCENTS: SET THE PERFECT FESTIVE MOOD TODAY!
- LONG-LASTING FRAGRANCES IN OUR MOST ADJUSTABLE WARMER YET!


Glade PlugIns Refills Air Freshener Starter Kit, Scented and Essential Oils for Home and Bathroom, Cookie Caramel Rush, 0.67 Fl Oz, 1 Warmer + 1 Refill
- EXPERIENCE COZY VIBES WITH COOKIE CARAMEL RUSH AIR FRESHENER!
- ELEVATE YOUR HOLIDAYS WITH OUR LIMITED EDITION SCENTS COLLECTION!
- ENJOY CUSTOMIZABLE AROMA STRENGTH FOR LONG-LASTING FRAGRANCE BLISS!
Uanvaha Food Decorative Night Light Chocolate Chip Cookie Funny Dessert Plug in Night Lights Auto LED Lamp Energy Saving Round Lights for Boys Girls Men Women
- ENERGY-EFFICIENT LED: SAFE, STYLISH LIGHTING FOR ANY ROOM!
- AUTO SENSOR: TURNS ON/OFF AUTOMATICALLY FOR HASSLE-FREE USE!
- PERFECT GIFT: IDEAL FOR ANY FAMILY MEMBER OR HOME DECOR!
AKKAVNIA Night Light Cookies and Snow Plug-in Wall LED Night Lamp with Dusk-to-Dawn Smart Sensor Lamp for Adult Bedroom Living Room Hallway Kitchen
- AUTOMATIC DUSK-TO-DAWN SENSOR: SAVES ENERGY & HASSLE-FREE USE!
- DURABLE & ECO-FRIENDLY DESIGN: LASTS 100,000 HOURS; SAFE MATERIALS!
- STYLISH & VERSATILE: PERFECT FOR ANY ROOM; ENHANCES DECOR EFFORTLESSLY!

Oeaskly Christmas Night Light,Cookies and Candy Canes Plug in Night Lights 0.5W Sleep Friendly for Boys Girls Led Night Light Dusk to Dawn Sensor Nightlight for Stairway/Hallway/Kitchen
-
AUTO SENSOR: DUSK-TO-DAWN FEATURE ELIMINATES MANUAL OPERATION.
-
STYLISH DESIGN: MODERN LOOK WITH COLORS TO MATCH ANY HOME DECOR.
-
LOW ENERGY USE: ONLY 0.5W; SAVE ON ELECTRICITY, UNDER 25 CENTS/YEAR!
Futterya Plug-in LED Night Light, Christmas Gingerbread Man Cookie Set of 2 Dusk-to-Dawn Auto Sensor Decor Lamp
-
AUTO ON/OFF FOR ENERGY SAVINGS: EFFORTLESS POWER MANAGEMENT FOR CONVENIENCE.
-
LONG-LASTING DURABILITY: UP TO 100,000 HOURS; NO BULB REPLACEMENT NEEDED.
-
VERSATILE & SPACE-SAVING DESIGN: PERFECT FOR ANY ROOM, TAKES MINIMAL OUTLET SPACE.
Vdsrup Cartoon Christmas Gingerbread Night Light Set of 2 Xmas Cookies Night Lights Plug in Wall LED Nightlight Auto Dusk to Dawn Sensor Lamp for Bedroom Bathroom Kitchen
- BRIGHT LED LIGHTS ILLUMINATE DARK SPACES AUTOMATICALLY AT DUSK.
- LONG-LASTING PERFORMANCE: 100,000 HOURS WITH ZERO MAINTENANCE WORRIES.
- ENERGY-EFFICIENT DESIGN SAVES ELECTRICITY WITHOUT COMPROMISING BRIGHTNESS.
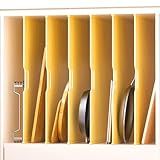
6 Set Trim-to-Fit Wood Tray Dividers for Cabinet, Cookie Sheet Organizer, Multi Layer Embedded Plug-in Board Storage, Cuttable DIY Storage Divider Insert for Kitchen Bedroom Cabinet Closet
- CUSTOMIZABLE SIZE: ADAPT BOARDS EASILY FOR ANY CABINET WIDTH.
- DURABLE MATERIAL: WATERPROOF WOOD WITH PROTECTIVE COATING FOR LONGEVITY.
- VERSATILE USE: IDEAL FOR KITCHENS, BEDROOMS, AND WARDROBE STORAGE NEEDS.
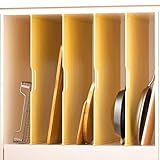
4 Set Trim-to-Fit Wood Tray Dividers for Cabinet, Cookie Sheet Organizer, Multi Layer Embedded Plug-in Board Storage, Cuttable DIY Storage Divider Insert for Kitchen Bedroom Cabinet Closet
-
FLEXIBLE SIZING: CUSTOMIZE FIT FOR CABINETS 5 TO 23+ WIDE.
-
DURABLE DESIGN: WATERPROOF, OIL-RESISTANT, AND MADE FROM QUALITY WOOD.
-
SIMPLE INSTALLATION: EASY SETUP WITH ADJUSTABLE INSTALLATION OPTIONS.
To get cookies in October CMS, you can follow these steps:
- Import Illuminate\Cookie\CookieJar and Illuminate\Cookie\CookieServiceProvider in your class file.
use Illuminate\Cookie\CookieJar; use Illuminate\Cookie\CookieServiceProvider;
- Register the CookieServiceProvider in the register() method of your plugin or module's service provider.
$this->app->register(CookieServiceProvider::class);
- Use the CookieJar class to set a cookie with the desired values. You can do this in your component's onRun() method or wherever it is appropriate.
$cookieJar = app(CookieJar::class); $cookieJar->queue('cookie_name', 'cookie_value', $minutes); // Replace 'cookie_name' and 'cookie_value' with your desired values, and $minutes with an integer representing the cookie duration in minutes. $cookieJar->queue('another_cookie', 'another_value', $minutes); // You can set multiple cookies in the same request.
- To retrieve the cookie values, you can use the Cookie facade in your component's code.
use Illuminate\Support\Facades\Cookie;
...
$cookieValue = Cookie::get('cookie_name'); // Replace 'cookie_name' with the name of the cookie you want to retrieve.
Note: Make sure you have set the cookie before trying to retrieve it using the Cookie facade.
By following these steps, you can set and retrieve cookies in your October CMS project.
How to create a plugin in October CMS?
To create a plugin in October CMS, you need to follow these steps:
- Install October CMS: Follow the official installation guide to set up a local development environment for October CMS.
- Create a Plugin: Navigate to the plugins directory in your October CMS installation. Inside the plugins directory, create a new directory for your plugin. For example, if your plugin is named "MyPlugin", create a directory named "MyVendor/MyPlugin".
- Define the Plugin: Inside the plugin directory, create a file named Plugin.php. This file will define the plugin and its properties. Here is an example of a Plugin.php file: