Best Content Management Tools to Buy in October 2025

The Survey Checklist for ASCs - A Tool for the CMS Conditions for Coverage & Interpretive Guidelines for Ambulatory Surgery Centers


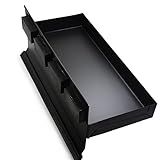
CMS Magnetics Magnetic Tool Tray, 10.75'x4.5'x1.25', Black w/Holding Magnets on Side for Cabinets, Tool Box or Kegerator Fridge | Keg Drip Tray | Beer Taps
- STRONG MAGNETS ENSURE FIRM ATTACHMENT TO TOOLBOXES AND CABINETS.
- VERSATILE USE: ORGANIZERS FOR TOOLS, SPICES, AND KEG DRIP TRAYS.
- ISO 9001 CERTIFIED QUALITY WITH A HASSLE-FREE RETURN POLICY.
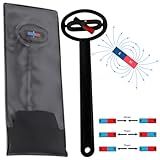
CMS Magnetics - Magnetic Pole Detector, a Handy Polarity Identifier to Determine Magnet's North or South Poles, Great for School Teachers, Science Projects, and Metal Detector
- DETECT MAGNETIC FIELDS FROM OVER A FOOT AWAY FOR SAFETY.
- COLOR-CODED POLES: RED FOR NORTH, BLUE FOR SOUTH CLARITY.
- PERFECT FOR EDUCATORS TO TEACH KIDS ABOUT MAGNETISM INTERACTIVELY.
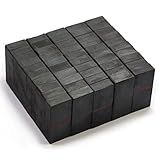
CMS MAGNETICS - 50-Piece (1-7/8 x 7/8 x 3/8 Inch) Ceramic Rectangular Domino Block Magnets | Grade-8 Hard Ferrite | Crafting, Magnet Therapy, Science Projects
- STRONG HOLD: 3.5 LB PULLING FORCE-PERFECT FOR VARIOUS APPLICATIONS!
- COST-EFFECTIVE: AFFORDABLE CHOICE COMPARED TO RARE EARTH MAGNETS.
- DURABLE DESIGN: RUST RESISTANT, IDEAL FOR WATER USE AND LASTING POWER.
Real-World Web Development with .NET 9 and C# 13 : Create dynamic full-stack applications using Razor Pages, Minimal APIs, Blazor, and Headless CMS tools
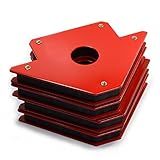
4 Pieces of CMS Magneitcs® Magnetic Welding Magnets 50 LBS Holding Power Welding Magnet | Welding Accessories | Magnetic Welding Holder
-
50 LB HOLDING POWER: EFFORTLESSLY SECURE METAL FOR SUPERIOR WELDS.
-
VERSATILE USE: PERFECT FOR TIG, MIG, STICK, AND MORE WELDING TYPES.
-
HANDS-FREE OPERATION: FOCUS ON WELDING WHILE THE HOLDER DOES THE WORK.
To delete a record in October CMS, you can follow the steps below:
- Open your October CMS project and navigate to the backend.
- Go to the section or module where the record you want to delete is located.
- Locate the specific record you intend to delete from the list or table.
- Click on the record's corresponding "View" or "Edit" button to open its details.
- Once the record details are displayed, search for the "Delete" or "Trash" button.
- Click on the "Delete" or "Trash" button to initiate the deletion process.
- You will typically be prompted with a confirmation message asking if you are sure about the deletion. Confirm your action.
- After confirmation, the record will be permanently deleted from the database and cannot be recovered.
- Refresh the page or navigate back to the list/table view to verify that the record has been successfully deleted.
Remember that deleting a record can have significant consequences, so exercise caution and make sure you have selected the correct record before proceeding with the deletion process.
How to show a confirmation message before deleting a record in October CMS?
In order to show a confirmation message before deleting a record in October CMS, you can follow these steps:
- Open the model that you want to add the confirmation message to. This is typically located in the /models directory.
- Find the fields.yaml file associated with the model. This file specifies the fields and attributes of the model.
- In the fields.yaml file, find the field or column that represents the delete button. This field should have the type button or delete to trigger the deletion action.
- Add the confirm attribute to the delete button field. Set the value of the confirm attribute to the confirmation message you want to display. For example:
delete_button: label: Delete type: delete confirm: Are you sure you want to delete this record?
- Save the fields.yaml file.
- If you are using the default backend form, the confirmation message should now appear when you click the delete button for a record.
Note: If you have a custom form or list view, you may need to modify the template or logic to display the confirmation message before deleting the record.
What is the process of deleting a record through an API in October CMS?
Deleting a record through an API in October CMS involves several steps:
- Define the API endpoint: In your Plugin.php file, define the API endpoint where the delete request will be made. For example, if you have a plugin called "MyPlugin" with a model called "Record", you can define the endpoint in the registerComponents() method:
public function registerComponents() { return [ 'MyPlugin\Components\Records' => 'records', ]; }
- Create a component: Create a component class (Records.php in this example) in the components directory of your plugin. In this class, implement the onDelete() method which will handle the delete request:
namespace MyPlugin\Components;
use Cms\Classes\ComponentBase;
class Records extends ComponentBase { public function componentDetails() { return [ 'name' => 'Records Component', 'description' => 'Provides API endpoint for deleting records', ]; }
public function onDelete()
{
    // Perform delete logic here
    $recordId = post('id');
    $record = \\MyPlugin\\Models\\Record::find($recordId);
    if($record){
        $record->delete();
    }

    // Return response
    return \['status' => 'success'\];
}
}
- Call the API endpoint: Now you can call the API endpoint to delete a record. The URL will be /api/records/delete (assuming your component's name is "records").
Send a POST request to this URL with the record ID to be deleted. For example:
POST /api/records/delete { "id": 1 }
This will trigger the onDelete() method in your component, which will find and delete the record based on the given ID.
Note: Make sure your plugin has the RainLab.User plugin installed and properly configured for API authentication.
What options are available to delete a record in October CMS?
There are multiple options available to delete a record in October CMS:
Option 1: Backend Interface
- Log in to the October CMS backend.
- Navigate to the desired record (e.g., in the "Records" section).
- Click on the record to open its details.
- Look for the delete button (usually represented by a trashcan icon).
- Click on the delete button to remove the record.
Option 2: Backend List View
- Log in to the October CMS backend.
- Navigate to the desired record's list view (e.g., in the "Records" section).
- Locate the record you want to delete.
- Look for the delete button next to the record's details (usually represented by a trashcan icon).
- Click on the delete button to remove the record.
Option 3: Code-based Deletion
- Access your project's code directory.
- Locate the model file representing the record you want to delete.
- Inside the model file, find the method responsible for deleting records (usually named "delete" or "destroy").
- Implement the necessary parameters and logic to delete the record in the method.
- Save the model file and run the specific code segment to trigger the record deletion.
Note: When using the code-based approach, you have more control over the deletion process and can delete multiple records simultaneously by implementing a specific condition or loop.