Best Content Management Tools to Buy in October 2025
The Survey Checklist for ASCs - A Tool for the CMS Conditions for Coverage & Interpretive Guidelines for Ambulatory Surgery Centers


CMS Magnetics Magnetic Tool Tray, 10.75'x4.5'x1.25', Black w/Holding Magnets on Side for Cabinets, Tool Box or Kegerator Fridge | Keg Drip Tray | Beer Taps
- STRONG MAGNETS SECURE TRAY TO TOOLBOXES AND CABINETS EFFORTLESSLY.
- VERSATILE USE: IDEAL FOR TOOLS, KITCHEN SPICES, OR KEGERATOR TAPS.
- ISO-CERTIFIED QUALITY WITH HASSLE-FREE RETURNS FOR PEACE OF MIND.
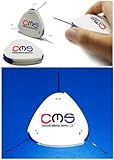
CMS Magnetics - Magnetic Pole Detector, a Handy Polarity Identifier to Determine Magnet's North or South Poles, Great for School Teachers, Science Projects, and Metal Detector
- DETECT MAGNETIC FIELDS FROM OVER A FOOT AWAY WITH EASE.
- VISUALIZE MAGNET POLES WITH RED NORTH AND BLUE SOUTH COLORING.
- PERFECT FOR EDUCATORS TO TEACH KIDS ABOUT MAGNETISM INTERACTIVELY.
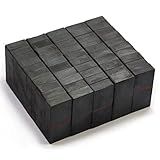
CMS MAGNETICS - 50-Piece (1-7/8 x 7/8 x 3/8 Inch) Ceramic Rectangular Domino Block Magnets | Grade-8 Hard Ferrite | Crafting, Magnet Therapy, Science Projects
- POWERFUL HOLD: 3.5 LB STRENGTH; IDEAL FOR HEAVY-DUTY APPLICATIONS.
- BUDGET-FRIENDLY: COST-EFFECTIVE ALTERNATIVE TO EXPENSIVE RARE EARTH MAGNETS.
- VERSATILE USE: PERFECT FOR EDUCATION, CRAFTS, THERAPY, AND LIGHT JOBS.
Real-World Web Development with .NET 9 and C# 13 : Create dynamic full-stack applications using Razor Pages, Minimal APIs, Blazor, and Headless CMS tools
4 Pieces of CMS Magneitcs® Magnetic Welding Magnets 50 LBS Holding Power Welding Magnet | Welding Accessories | Magnetic Welding Holder
- 50 LB HOLDING POWER: SECURELY HOLDS METAL PARTS IN PLACE.
- VERSATILE USE: COMPATIBLE WITH ALL WELDING TECHNIQUES AND APPLICATIONS.
- HANDS-FREE OPERATION: FOCUS ON PRECISION WITH RELIABLE SUPPORT.
CMS Retractable 3-in-One Weinstein Monofilament Diabetic Neuropathy Foot Test Rotating Wheel 4.17(1g) 5.07(10g) 6.10(75g) Filament FootFilament
- COMPACT DESIGN WITH 3 MONOFILAMENT SIZES FOR VERSATILE USE.
- ASSESS NERVE SENSITIVITY ACCURATELY WITH PATENTED ROTATING WHEEL.
- USER-FRIENDLY TOOL ENHANCES TOUCH AND PRESSURE SENSATION TESTING.
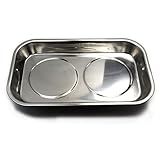
CMS Magnetics - (2 Ct, 5.5” x 9”) Stainless Rectangular Tray w/Strong Magnets for Tools & Hardware, Applications - Tool Tray, Organizer for Mechanics & Handyman, Auto Shop, Workshop
- STRONG MAGNETS HOLD SECURELY ON CARS AND SURFACES FOR EASY ACCESS.
- ORGANIZE TOOLS AND HARDWARE EFFORTLESSLY IN ONE PORTABLE TRAY.
- IDEAL FOR HANDYMEN AND TECHNICIANS FOR EFFICIENT PROJECT MANAGEMENT.
To create a new page in October CMS, follow these steps:
- Log in to your October CMS backend using your admin credentials.
- Click on the "Pages" tab in the sidebar.
- In the top right corner, click on the "New" button to start creating a new page.
- Enter a title for your page in the "Title" field. This will be the name that appears in the backend for your reference.
- Choose a URL for your page by entering a value in the "URL" field. Make sure to use lowercase letters and separate words with hyphens or underscores.
- In the "Layout" dropdown, select the layout that you want to use for your page. This will define the overall structure and design of your page.
- If you want your new page to be accessible from the main menu, check the "Add to Menu" checkbox.
- You can also add page content by entering it into the "Content" textarea.
- Click the "Save" button to create the new page.
After following these steps, your new page will be created and you can start customizing it further by adding components, custom CSS, or JavaScript as needed.
What is a partial in October CMS?
In October CMS, a partial is a reusable component that contains a specific piece of markup code or functionality. It is similar to a template, but it is intended to be included or embedded within other templates or pages.
Partials are typically used to break down complex templates or pages into smaller and more manageable pieces. They can be used to define common elements such as headers, footers, sidebars, or any other section of a page that needs to be reused across multiple pages or templates.
By using partials, developers can easily maintain and update specific sections of a website without the need to make changes to every single template or page where those sections are included. It promotes reusability, code organization, and modularity in development.
How to edit an existing page in October CMS?
To edit an existing page in October CMS, you can follow these steps:
- Login to the October CMS backend by navigating to your website's URL and appending "/backend" at the end. For example, if your website is "example.com", the backend URL would be "example.com/backend".
- Once logged in, you will be directed to the Dashboard. Click on the "Pages" option in the left sidebar to view a list of all pages.
- Find the page you want to edit and click on its name. This will open the page editor.
- In the page editor, you can make changes to the content, layout, and settings of the page. You can use the drag-and-drop editor to add or rearrange content blocks, customize the page URL, adjust SEO options, and more.
- After making your changes, click the "Save" or "Save & Close" button to save your modifications. The "Save" button will only save the changes without closing the editor, while the "Save & Close" button will save the changes and close the editor.
- If you wish to review the changes on the front-end of your website, click the "View" button located at the top of the page editor. This will open a new tab or window with the live version of the edited page.
Remember to clear your website cache if necessary to see the changes immediately.
How to create a blog post page in October CMS?
To create a blog post page in October CMS, you can follow these steps:
- Install October CMS: If you haven't already, make sure you have October CMS installed on your local or remote server.
- Create a new page: Go to your October CMS backend and navigate to the Pages section. Click on the "Create" button to create a new page.
- Set up the page layout: In the page creation form, fill in the required fields such as Title, URL, and Layout. The layout will determine the general structure and design of your blog post page.
- Add a blog post component: Scroll down to the Components section and click on the "Add Component" button. From the popup, select the "Blog Post" component.
- Configure the component: Once added, configure the Blog Post component by setting the necessary options, such as specifying the blog post to display, setting up a custom template, and selecting the fields to display (title, content, author, date, etc.).
- Save and publish: Save your changes and publish the page. You can now visit the URL of your blog post page to see how it looks.
- Customizing the template: If you wish to customize the appearance of the blog post page, you can create a partial or a separate template file and modify it according to your needs. You can use the default blog post template provided by October CMS as a starting point.
Remember to familiarize yourself with the specific documentation of the blog component you are using, as it may have additional features and options to enhance your blog post page.