Best PHP Development Books to Buy in October 2025

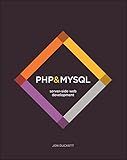
PHP & MySQL: Server-side Web Development


PHP and MySQL: The Comprehensive Guide to Server-Side Web Development with PHP 8 – Build Dynamic Websites with Database Integration, Security, and More (Rheinwerk Computing)


Front-End Back-End Development with HTML, CSS, JavaScript, jQuery, PHP, and MySQL


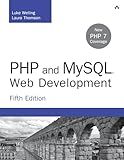
PHP and MySQL Web Development (Developer's Library)


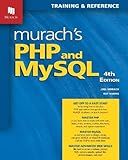
Murach's PHP and MySQL (4th Edition)


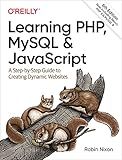
Learning PHP, MySQL & JavaScript: A Step-by-Step Guide to Creating Dynamic Websites (Learning PHP, MYSQL, Javascript, CSS & HTML5)


Full Stack Web Development For Beginners: Learn Ecommerce Web Development Using HTML5, CSS3, Bootstrap, JavaScript, MySQL, and PHP


PHP Crash Course: The Complete, Modern, Hands-On Guide


Head First PHP & MySQL: A Brain-Friendly Guide


To configure PHP error reporting in XAMPP, follow these steps:
- Locate the 'php.ini' file. In XAMPP, you can find it in the 'php' folder within the XAMPP installation directory (e.g., 'C:\xampp\php').
- Make a backup of the 'php.ini' file before making any changes to it. This step ensures that you can revert to the original settings if needed.
- Open the 'php.ini' file in a text editor of your choice.
- Search for the following line within the file: error_reporting = E_ALL This line defines the level of error reporting. By default, it is set to report all types of errors.
- If you want to customize the error reporting level, modify the value of 'error_reporting'. For example, you can use the following standard values: E_ALL - Report all types of errors E_ERROR - Report fatal errors only E_WARNING - Report warnings E_NOTICE - Report notices E_PARSE - Report parse errors E_DEPRECATED - Report deprecated functions and features You can combine different error types using the bitwise OR operator '|' (e.g., E_ALL | E_WARNING to report all errors and warnings).
- After making the changes, save the 'php.ini' file.
- Restart the Apache server in XAMPP to apply the changes. You can do this by clicking the 'Stop' button and then the 'Start' button next to 'Apache' in the XAMPP control panel.
Once the server restarts, PHP will begin using the new error reporting configuration specified in the 'php.ini' file. This will help you debug and troubleshoot issues in your PHP applications effectively.
What is the usage of track_errors in XAMPP?
The track_errors directive in XAMPP is used to control the error reporting behavior of PHP.
When track_errors is set to true, PHP's error_reporting value will be set to E_ALL | E_STRICT. This means that all types of errors and warnings will be displayed, including strict standards.
On the other hand, when track_errors is set to false, the error_reporting value will be set to E_ALL & ~E_NOTICE. This will display all errors and warnings except for notices.
By default, track_errors is set to false in XAMPP. However, it can be modified in the php.ini file according to the user's preference for handling error reporting.
What are the different error reporting levels in PHP?
In PHP, there are several error reporting levels that can be set using the error_reporting() function or the error_reporting directive in the php.ini file. These levels determine which types of errors and warnings are displayed or reported.
- E_ERROR: This level reports critical errors that cause the script to terminate execution.
- E_WARNING: It reports non-critical errors that won't stop the script execution but may cause unexpected behavior.
- E_PARSE: This level reports parse errors that occur during the compilation of a script.
- E_NOTICE: It reports runtime notices that may indicate potential issues in the code.
- E_DEPRECATED: This level reports the usage of deprecated features or functions that may be removed in future versions.
- E_STRICT: It reports coding standards recommendations to ensure code compatibility and maintainability.
- E_CORE_ERROR: This level reports severe errors that occur during PHP startup, before the error handling system is fully functional.
- E_CORE_WARNING: It reports non-critical warnings that occur during PHP startup.
- E_COMPILE_ERROR: This level reports errors that occur during the script compilation, before the script is executed.
- E_COMPILE_WARNING: It reports non-critical warnings that occur during the script compilation.
- E_USER_ERROR: This level reports errors generated by the user using the trigger_error() function.
- E_USER_WARNING: It reports user-generated warnings using the trigger_error() function.
- E_USER_NOTICE: This level reports user-generated notices using the trigger_error() function.
- E_USER_DEPRECATED: It reports user-generated deprecation warnings using the trigger_error() function.
- E_ALL: It reports all types of errors, warnings, and notices except strict standards and deprecation notices.
These different error reporting levels allow developers to control the level of error reporting based on their need for debugging and troubleshooting during development or production environments.
How to customize error messages in XAMPP?
To customize error messages in XAMPP, you can follow these steps:
- Locate the php.ini file: In XAMPP, the php.ini file can be found in the php folder. The path might be something like C:\xampp\php\php.ini.
- Open the php.ini file in a text editor.
- Look for the display_errors directive: By default, it might be set to Off. Change it to On by modifying the line: display_errors = On.
- Customize the error reporting level: Find the error_reporting directive. Modify it as per your needs. For example, you can set error_reporting = E_ALL to display all types of errors.
- Save the changes and close the php.ini file.
- Restart the Apache server: Open the XAMPP Control Panel. Stop and start the Apache server for the new changes to take effect.
Now, when a PHP error occurs, XAMPP should display the customized error message based on your configuration.
How to disable error reporting in XAMPP?
To disable error reporting in XAMPP, you can follow these steps:
- Locate the "php.ini" file. In XAMPP, the file is usually located in the "php" directory.
- Open the "php.ini" file using a text editor.
- Search for the following lines: display_errors = On error_reporting = E_ALL
- Change the values of these lines to: display_errors = Off error_reporting = E_ALL & ~E_NOTICE & ~E_DEPRECATED This configuration will hide error messages from being displayed.
- Save the "php.ini" file and restart the Apache server in XAMPP.
After completing these steps, error reporting should be disabled in XAMPP, and error messages will no longer be displayed on the webpages.
What are the PHP error_reporting constants in XAMPP?
In XAMPP, the PHP error_reporting constants are as follows:
- E_ERROR: This constant represents fatal errors that may cause script termination.
- E_WARNING: This constant represents non-fatal runtime warnings.
- E_PARSE: This constant represents compile-time parse errors.
- E_NOTICE: This constant represents runtime notices, indicating that the code may have problems but can still continue execution.
- E_CORE_ERROR: This constant represents fatal errors that occur during PHP's initial startup (core errors).
- E_CORE_WARNING: This constant represents non-fatal warnings that occur during PHP's initial startup.
- E_COMPILE_ERROR: This constant represents fatal compile-time errors.
- E_COMPILE_WARNING: This constant represents non-fatal compile-time warnings.
- E_USER_ERROR: This constant represents user-generated error messages.
- E_USER_WARNING: This constant represents user-generated warning messages.
- E_USER_NOTICE: This constant represents user-generated notice messages.
- E_STRICT: This constant represents warnings generated by PHP's strict standards.
- E_RECOVERABLE_ERROR: This constant represents catchable fatal errors.
- E_ALL: This constant represents all errors and warnings, except of type E_STRICT.
- E_DEPRECATED: This constant represents warnings about PHP features that will be removed in the future.
You can set these constants in your PHP configuration file (php.ini) or using the error_reporting() function within your PHP script.
How to log PHP errors to a specific file in XAMPP?
To log PHP errors to a specific file in XAMPP, you need to follow these steps:
- Locate the PHP configuration file (php.ini) in your XAMPP installation. Typically, it is located at C:\xampp\php\php.ini.
- Open the php.ini file in a text editor.
- Search for the error_reporting directive. By default, it is set to E_ALL & ~E_NOTICE. You may want to modify it depending on the level of errors you want to log. For example, use E_ALL to log all types of errors, or E_ALL & ~E_NOTICE & ~E_STRICT to log all errors except notices and strict standards.
- Search for the display_errors directive. By default, it is set to On, which means errors will be displayed on the screen. Change it to Off to disable error display.
- Search for the log_errors directive. By default, it is set to Off. Change it to On to enable error logging.
- Search for the error_log directive. By default, it is empty. Set the path of the file where you want the errors to be logged. For example, you can set it as error_log = "C:\xampp\php\logs\php-error.log" to log errors in a file named php-error.log in the logs folder.
- Save the changes to the php.ini file.
- Restart the Apache server in XAMPP to apply the changes.
Now, PHP errors will be logged to the file you specified in the error_log directive.
