
Best CSV Export Tools to Buy in October 2025

Software Design by Example


Temtop Advanced Air Quality Monitor for CO2, PM2.5, PM10, with Audio Alarm, Temp & Humidity Insights, Plus Data Export for in-Depth Analysis, M2000C 2ND
-
ENSURE HEALTHY ENVIRONMENTS: MONITOR CO2, PM2.5, AND PM10 LEVELS EASILY.
-
ANALYZE DATA EFFICIENTLY: EXPORT READINGS IN CSV FOR DETAILED TRACKING.
-
USER-FRIENDLY FEATURES: COLORFUL DISPLAY AND ALARMS FOR INSTANT INSIGHTS.
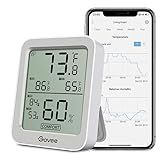
Govee Bluetooth Digital Hygrometer Indoor Thermometer, Room Humidity and Temperature Sensor Gauge with Remote App Monitoring, Large LCD Display, Notification Alerts, 2 Years Data Storage Export, Grey
-
EFFORTLESS SETUP: CONNECT IN MINUTES WITH THE GOVEE HOME APP.
-
PRECISION MONITORING: SWISS SENSOR DELIVERS ACCURATE TEMP/HUMIDITY.
-
SMART ALERTS: GET INSTANT NOTIFICATIONS FOR ANY ENVIRONMENT CHANGES.
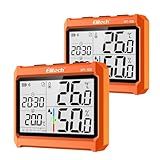
Elitech 2Pack Digital Bluetooth Hygrometer Thermometer, Refrigerator Thermometer with Free APP, Real-Time Temperature Humidity Monitor, PDF&CSV Data Export, IPT-100S with External Probe
-
ACCURATE MONITORING: DUAL SENSORS DELIVER PRECISE TEMP & HUMIDITY TRACKING.
-
FLEXIBLE RECORDING: STORE 5,000 DATA SETS; ADJUST INTERVALS FROM 30S TO 1H.
-
EASY DATA ACCESS: QUICKLY REVIEW HISTORY; REAL-TIME MONITORING VIA APP.

Kenmore K3000 CSV HEPA Replacement filters for Cordless Stick Vacuum
- EXCLUSIVE KENMORE HEPA FILTER ENSURES OPTIMAL VACUUM PERFORMANCE.
- PERFECT FIT FOR MULTIPLE KENMORE STICK VACUUM MODELS LISTED.
- ENHANCE AIR QUALITY WITH HIGH-EFFICIENCY HEPA FILTRATION.
Microsoft Log Parser Toolkit: A Complete Toolkit for Microsoft's Undocumented Log Analysis Tool
- QUALITY GUARANTEED: EACH BOOK IS INSPECTED FOR GOOD CONDITION.
- AFFORDABLE PRICING: ENJOY GREAT READS WITHOUT BREAKING THE BANK!
- ECO-FRIENDLY CHOICE: SUPPORT RECYCLING AND SUSTAINABLE READING HABITS.
To append rows in a CSV export in Laravel, you can use the Laravel Excel package. First, you need to create a new Excel instance and set the desired export format (e.g., CSV). Then, you can append rows to the export file by calling the append method and passing an array of data for each row you want to add. Finally, you can save the export file using the store or download method.
Here is an example code snippet to illustrate how to append rows in a CSV export in Laravel using the Laravel Excel package:
use Maatwebsite\Excel\Facades\Excel;
$exportData = [ ['Column 1', 'Column 2', 'Column 3'], ['Data 1', 'Data 2', 'Data 3'], ['Data 4', 'Data 5', 'Data 6'], ];
$export = Excel::create('example', function($excel) use ($exportData) { $excel->sheet('Sheet1', function($sheet) use ($exportData) { $sheet->fromArray($exportData, null, 'A1', false, false); }); })->store('csv');
In this example, we create an Excel instance and add rows of data to the export using an array. We then specify the export format as CSV and save the file. This will append the rows to the existing export file or create a new one if it does not exist.
What is the recommended approach for appending rows in a CSV export in Laravel?
The recommended approach for appending rows in a CSV export in Laravel is to use the League\Csv package. This package provides a fluent interface for creating and modifying CSV files in Laravel.
To append rows to an existing CSV file, you can first read the existing file into a Csv object, then add the new rows using the insertOne method. Finally, you can save the updated CSV file using the save method.
Here's an example code snippet demonstrating how to append rows to a CSV file using the League\Csv package in Laravel:
use League\Csv\Reader; use League\Csv\Writer;
// Read existing CSV file $reader = Reader::createFromPath('/path/to/existing/file.csv', 'r'); $writer = Writer::createFromReader($reader);
// Append new rows $newRows = [ ['John', 'Doe', 'example@example.com'], ['Jane', 'Smith', 'test@test.com'], ]; $writer->insertAll($newRows);
// Save updated CSV file $writer->output('/path/to/updated/file.csv');
In this example, we first read an existing CSV file into a Csv object using the Reader::createFromPath method. Then, we create a Writer object from the Reader object to enable appending rows to the file. We then append new rows to the Writer object using the insertAll method, and finally save the updated CSV file using the output method.
This approach ensures that the existing CSV file is not overwritten and that new rows are appended to the file.
What method should I use to append rows in a CSV export in Laravel?
You can use the fputcsv() function in PHP to append rows to a CSV file in Laravel. Here's an example:
$filename = 'export.csv';
// Open the CSV file for writing in append mode $file = fopen($filename, 'a');
// Add a new row to the CSV file $row = ['John Doe', 'johndoe@example.com', '1234567890']; fputcsv($file, $row);
// Close the file fclose($file);
In this example, we open the CSV file in append mode, add a new row to it using the fputcsv() function, and then close the file. This will append the new row to the existing CSV file.
How to track changes made by appending rows in a CSV export in Laravel?
To track changes made by appending rows in a CSV export in Laravel, you can use Laravel's built-in Auditing feature or create a custom solution. Here is how you can achieve this using Laravel's Auditing feature:
- Install the Laravel Auditing package by running the following command in your terminal:
composer require owen-it/laravel-auditing
- Publish the package's configuration file and migration files by running the following command:
php artisan vendor:publish --provider="OwenIt\Auditing\AuditingServiceProvider" --tag="auditing" php artisan migrate
- Add the Auditable trait to the model representing your CSV export data. For example, if you have a CsvExport model, it should look like this:
use OwenIt\Auditing\Contracts\Auditable;
class CsvExport extends Model implements Auditable { use \OwenIt\Auditing\Auditable;
// Other model code here
}
- In your controller or wherever you are appending rows to the CSV export, make sure to add the relevant data to the CsvExport model and save it:
$csvExport = new CsvExport(); $csvExport->data = $newRowData; $csvExport->save();
- Now every time a new row is appended to the CSV export, Laravel Auditing will track the changes made to the CsvExport model. You can access the audit trail using the audits method on your CsvExport model instance:
$changes = $csvExport->audits;
This way, you can easily track changes made by appending rows in a CSV export in Laravel using Laravel Auditing.
What are the benefits of appending rows in a CSV export in Laravel?
- Streamlined data organization: Appending rows in a CSV export allows you to easily add new data entries to an existing file without having to recreate the entire document. This makes it easier to manage and update large data sets efficiently.
- Time-saving: Instead of having to export the entire data set each time you need to make a change, appending rows allows you to quickly add new data entries to the existing file. This can save time and prevent you from having to repeat the export process unnecessarily.
- Consistent formatting: Appending rows ensures that the data formatting remains consistent throughout the document. This is especially useful when working with large data sets that require precise formatting for analysis or reporting purposes.
- Scalability: As your data set grows, appending rows allows you to keep adding new data entries to the existing file without worrying about file size limitations or performance issues. This scalability can be particularly useful for applications that require regular updates to their data exports.
- Enhanced data management: Appending rows in a CSV export allows you to maintain a comprehensive record of all data entries in a single file. This makes it easier to track changes over time and analyze trends in your data set.
How can I add additional rows to an existing CSV export in Laravel?
To add additional rows to an existing CSV export in Laravel, you can use the LaravelExcel package. Here's a step-by-step guide on how to do this:
- Install the LaravelExcel package:
composer require maatwebsite/excel
- Create a new class that extends the Maatwebsite\Excel\Concerns\FromCollection interface. This class will represent the data that you want to append to the existing CSV export. For example:
namespace App\Exports;
use Maatwebsite\Excel\Concerns\FromCollection;
class AdditionalDataExport implements FromCollection { public function collection() { return collect([ ['Column 1', 'Column 2', 'Column 3'], ['Data 1', 'Data 2', 'Data 3'], ]); } }
- In your controller where you are exporting the CSV file, you can append the additional rows using the append method. Here's an example:
use Maatwebsite\Excel\Facades\Excel; use App\Exports\AdditionalDataExport;
public function exportCsv() { $existingData = // Logic to get existing data
return Excel::download(new AdditionalDataExport, 'additional\_data.csv')
    ->append($existingData);
}
- Make sure to update the namespace and filename in the download method to match your specific implementation.
By following these steps, you should be able to add additional rows to an existing CSV export in Laravel using the LaravelExcel package.